Direct Debit Payment Plan
Step 1

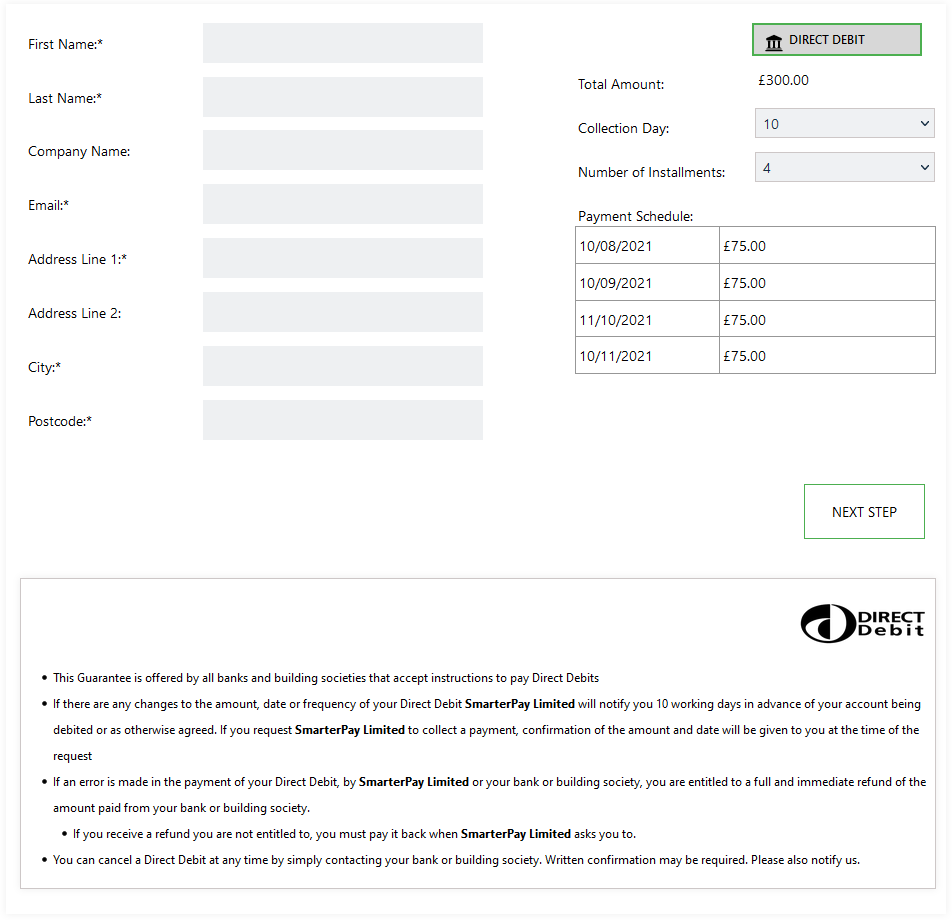
The mandatory customer detail fields displayed will need to be populated in order to proceed. Please see the list of fields and the requirments below.
If an existing cloud customer ID was passed in the link the fields will be pre-populated. These details can be changed if the record has not been marked as “locked”.
Customer Detail Fields
| Field | Mandatory | Type | Description |
|---|---|---|---|
| First Name | Yes | Text Box | Maximum 50 characters. The First Name of the Customer. |
| Last Name | Yes | Text Box | Maximum 50 characters. The Last Name of the Customer. |
| Company Name | No | Text Box | Maximum 50 characters. The Company name of the Customer. |
| Yes | Text Box | Maximum 100 characters. The Email Address of the Customer. | |
| Address Line 1 | Yes | Text Box | Maximum 50 characters. First Line of the Billing Address. |
| Address Line 2 | No | Text Box | Maximum 50 characters. Second Line of the Billing Address. |
| City | Yes | Text Box | Maximum 50 characters. The Billing Address City. |
| Post code | Yes | Text Box | Maximum 50 characters. The Billing Address Post Code. |
Payment Options
| Field | Type | Description |
|---|---|---|
| Collection Day | Dropdown | For Monthly payments defines the day of the month for collection. Options: 1-28 & Last Day. Default day set in the E-Commerce Branding section of SmarterPay Cloud. |
| Number of Installments | Dropdown | Defines the number of instalments that the amount should be taken over. Minimum, Maximum and default number instalments set in the E-Commerce Branding section of SmarterPay Cloud. |
Actions
| Action | Description |
|---|---|
| “NEXT STEP” Button | Moves to the next step of the Wizard. |
Step 2

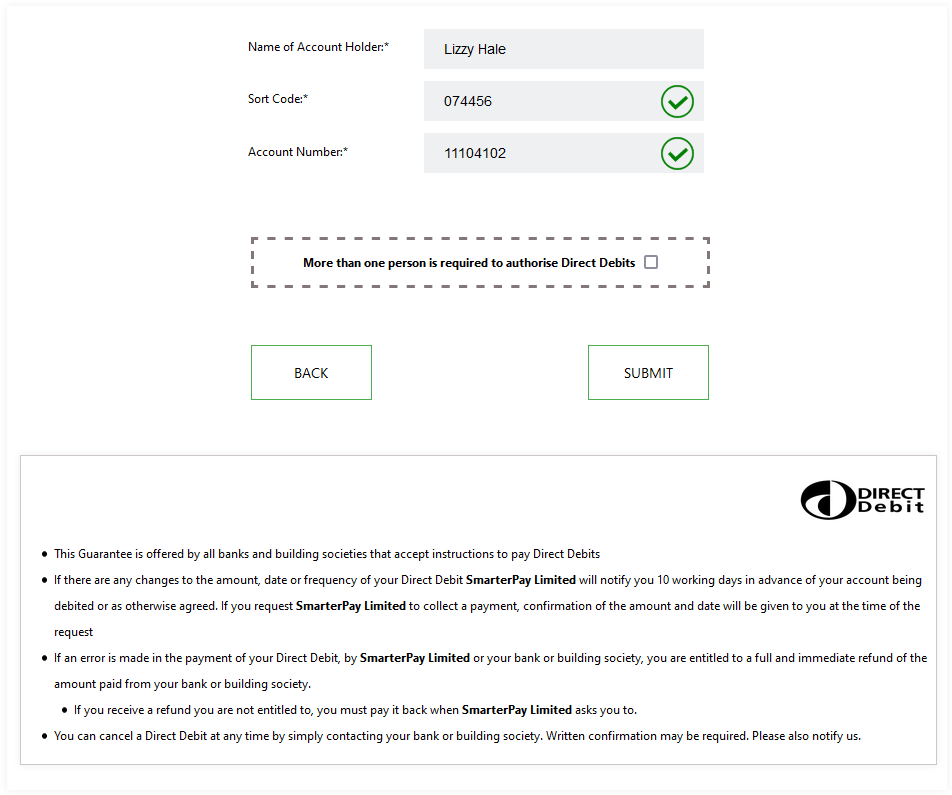
The mandatory fields will need to be populated in order to proceed.
Fields
| Field | Mandatory | Type | Description |
|---|---|---|---|
| Name of Account Holder | Yes | Text Box | Customer Name for the Bank Account. |
| Sort Code | Yes | Text Box | Sort Code for the Customer Bank Account. Note: 6 numbers required. |
| Account Number | Yes | Text Box | Account number for the Customer Bank Account. Note: 8 numbers required. |
| More than one person is required to authorise Direct Debits | No | Checkbox | Select if you need to provide more than one signatury for the creation of a Mandate. |


Once an Account Number and Sort Code have been provided the system will Modulus Check the details and feedback the results.
If the Account Number and Sort Code are good you will see green ticks and you can proceed.
Any issues will display a red cross, and an error message if more details available.
Actions
| Action | Description |
|---|---|
| “BACK” Button | Returns to the previous step of the Wizard. |
| “SUBMIT” Button | Moves to the next step of the Wizard. |
Step 3
Single Signatory

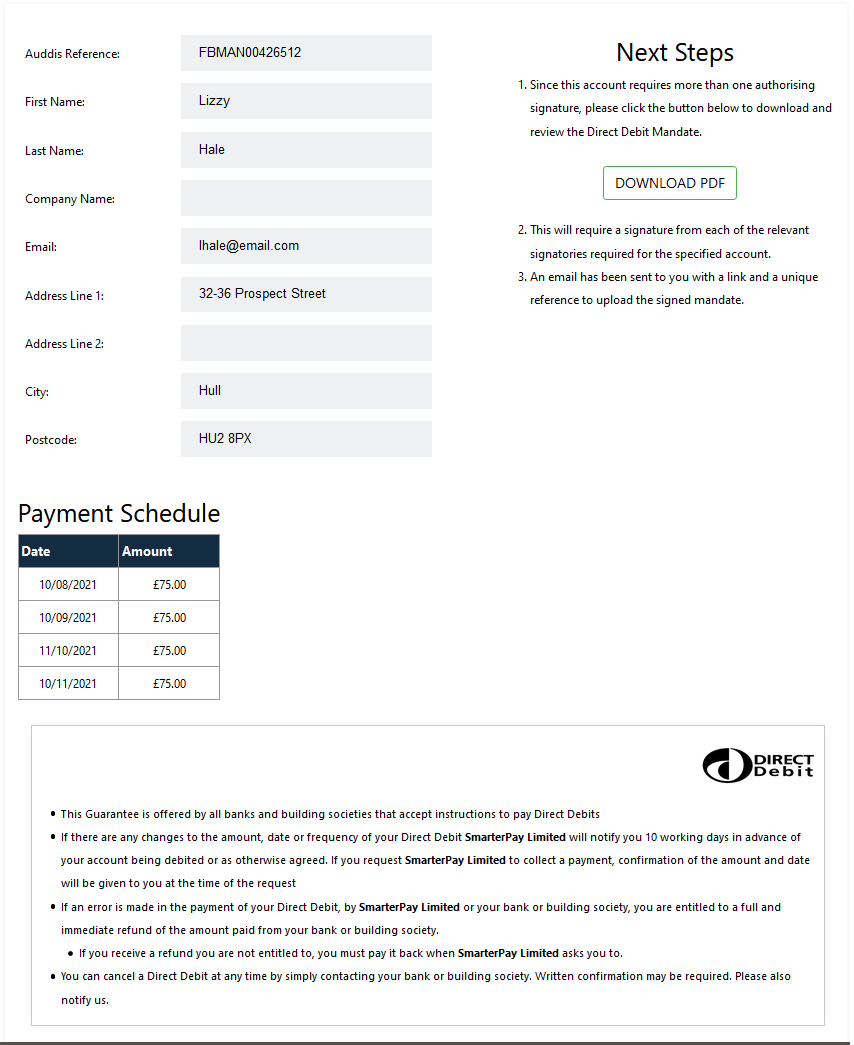
If the signup was for a Single Signatory, the “More than one person is required to authorise Direct Debits” option wasn't selected, then the Mandate has now been setup and the browser can be closed.
Multiple Signatories

If the signup was for a Multiple Signatories, the “More than one person is required to authorise Direct Debits” option was selected, then the Mandate is setup and a download PDF link is displayed.
This Mandate form will need to be signed and uploaded by using the link that was emailed to the email address provided.