Manage Account
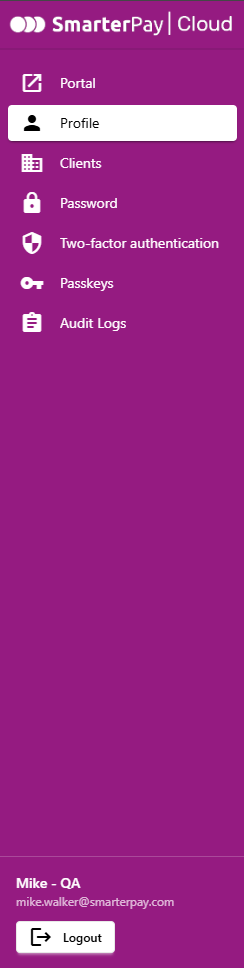
More details for each section can be found by either scrolling down the page or following the links.
Portal
If you only have access to one client then clicking on Portal will take you to the Portal Landing Page.
If you have access to multiple clients then clicking will take you to the Switch Client menu.
Profile
The Profile section allows the changing of your display name or email address for SmarterPay Cloud. This section is initially displayed when you click on the “Manage Account” Menu item.
Clients
The Clients section allows you to view which clients you have access to, and leave them if desired.
Password
The Password section allows you to change your password.
Two-factor authentication
The Two-factor authentication section allows you to set, and change, your Two-factor authentication methods.
Passkeys
The Passkeys section allows you to set, and remove, passkeys.
Audit Logs
The Audit Logs section allows you to view a log of your account activity.
Logout
Logout of the SmarterPay Cloud.
Profile
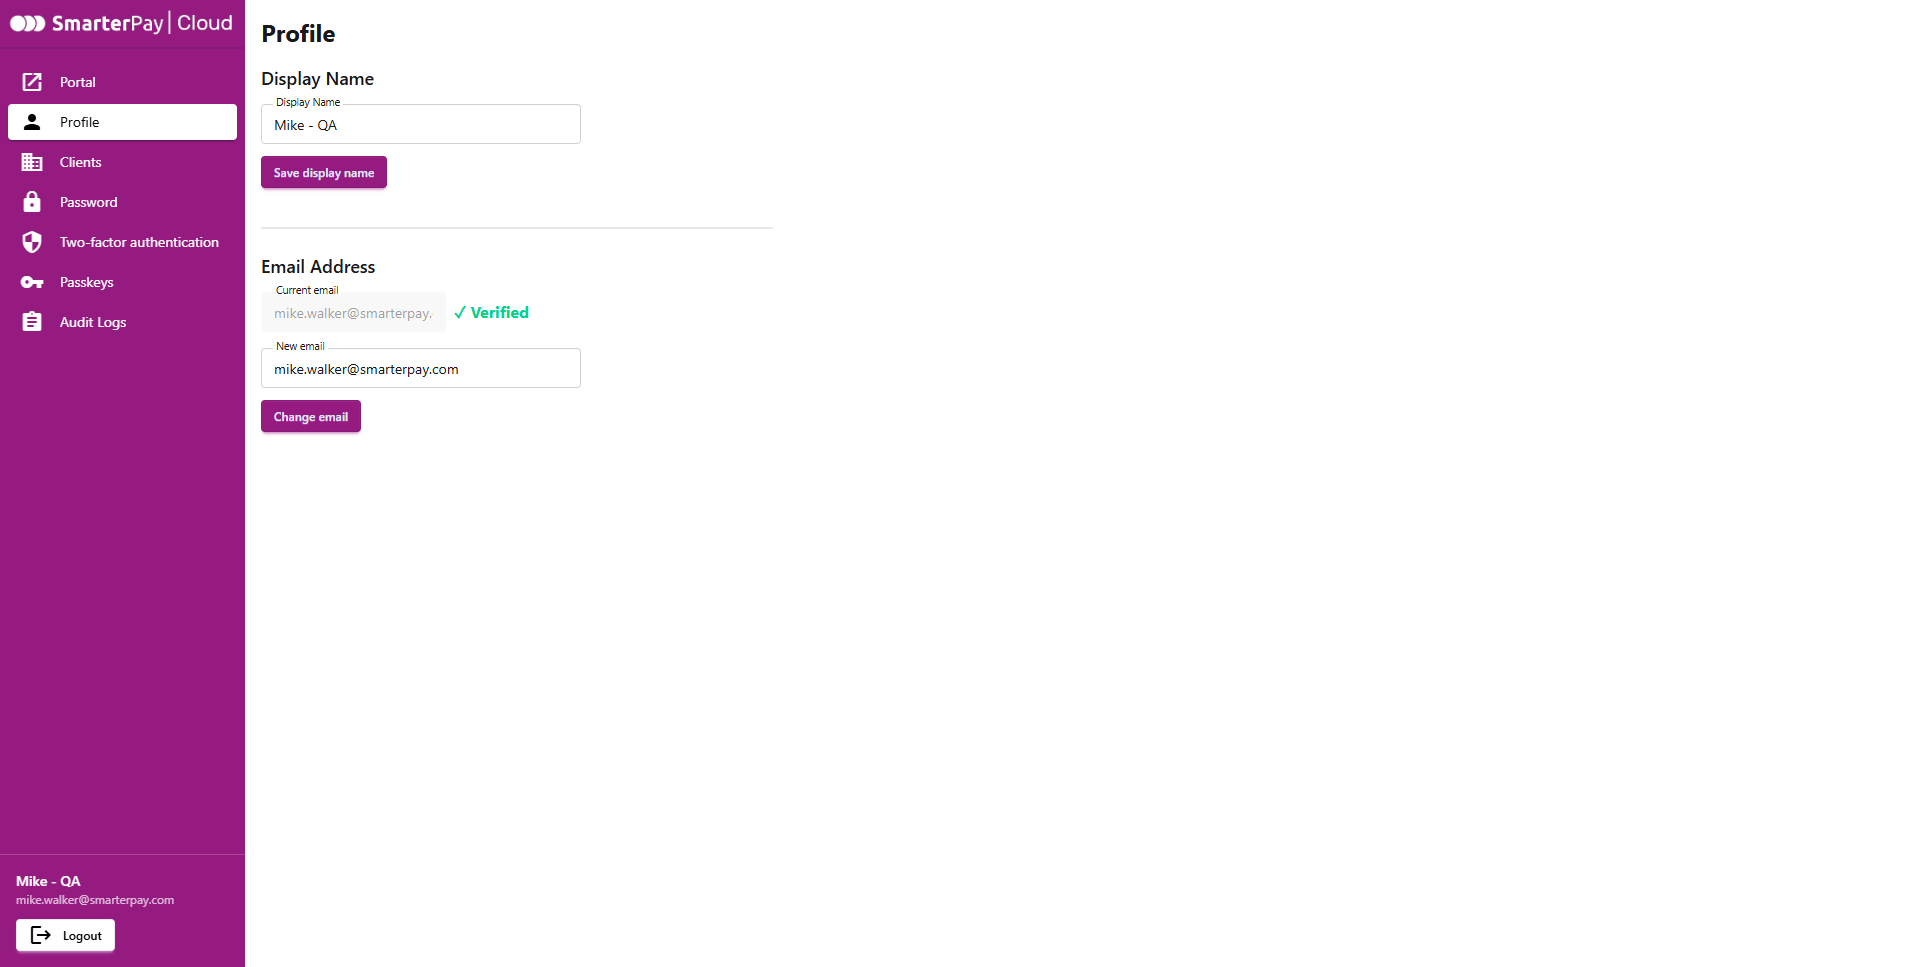
Display Name
By default your display name is your email address.
If you want to change your display name enter the desired text in this field and click “Save display name”.
Email Address
To change your email address, enter your new email address in the “New Email” text box and click “Change email”.
An email will be sent to the new email address.
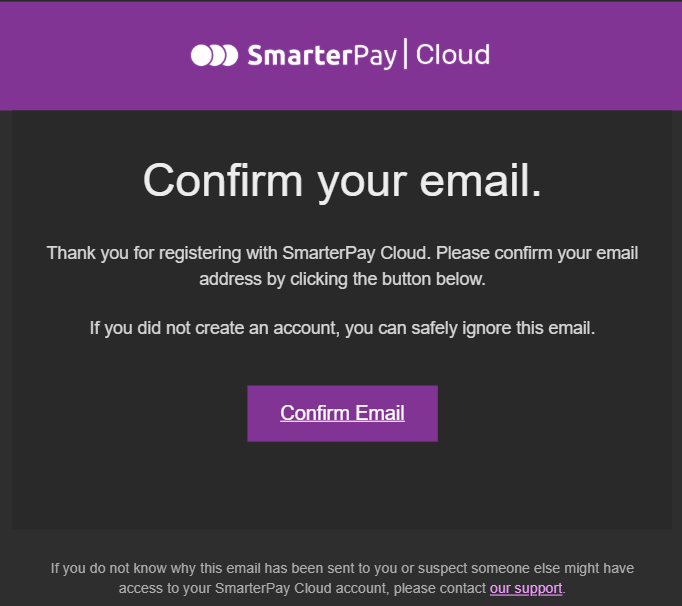
On the email, click on the “Confirm Email” link, this will open up your browser
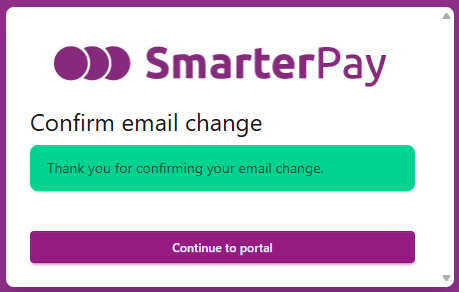
Your email address has now been updated on your record.
Clients
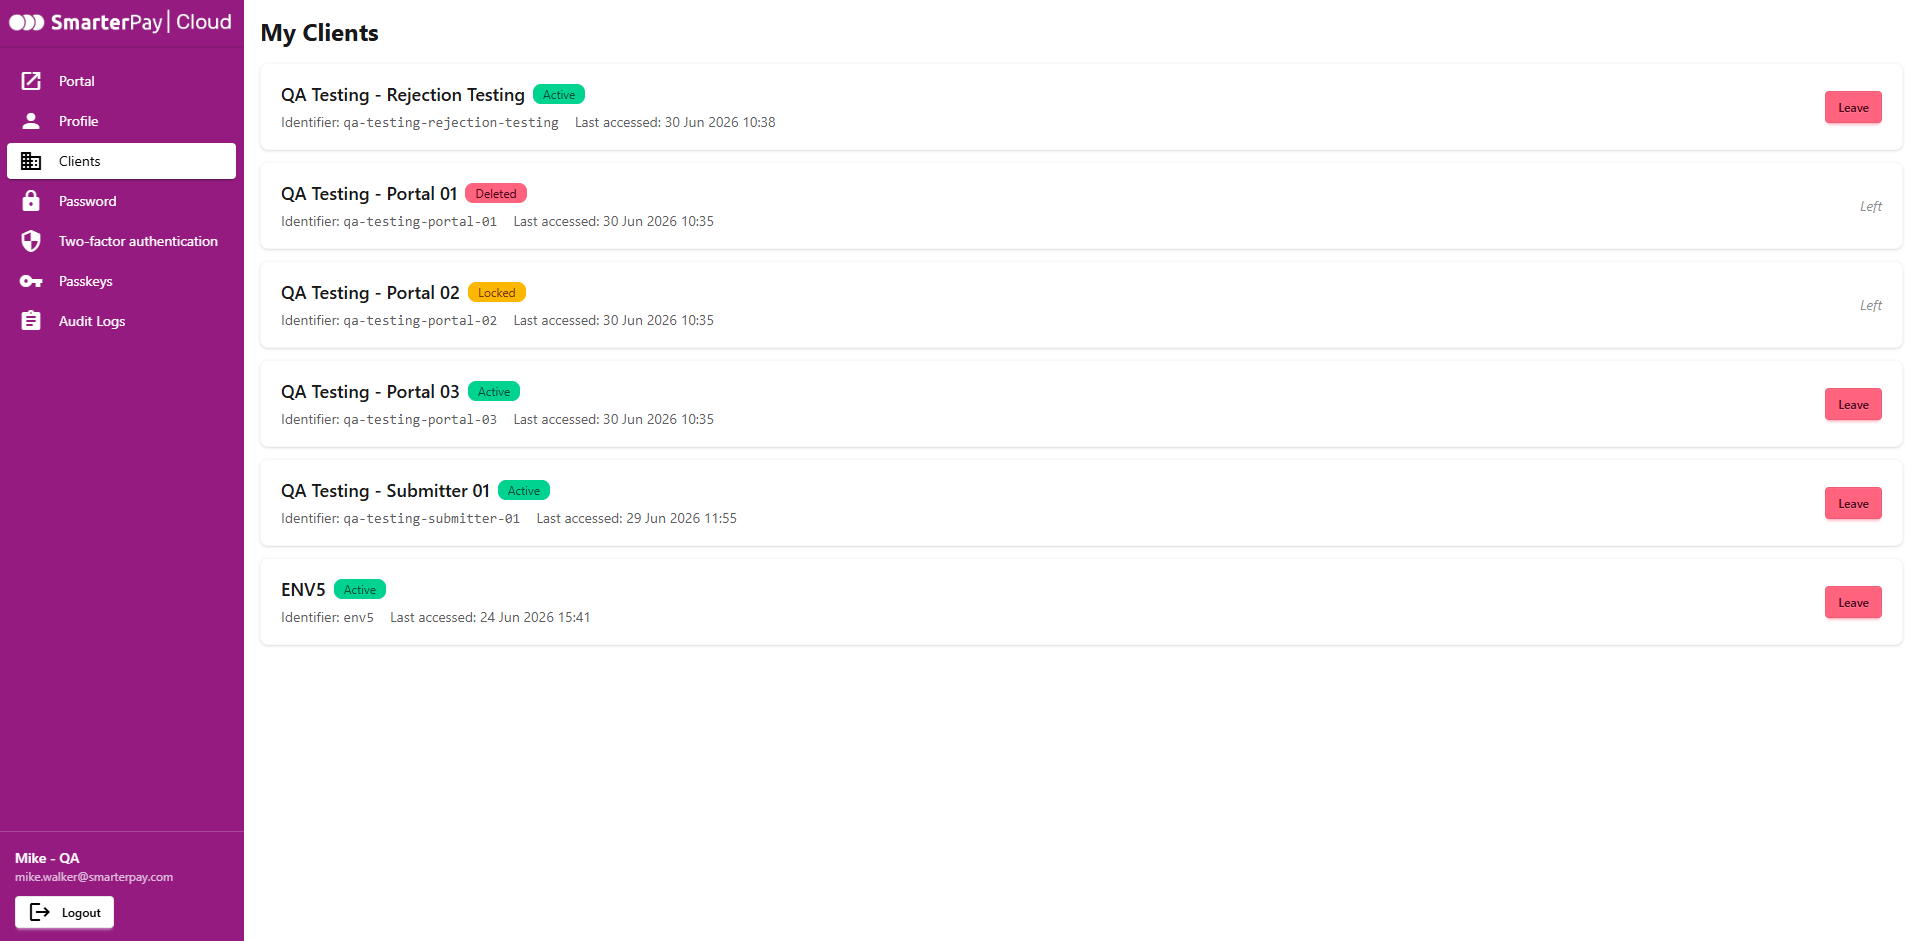
My Clients
This list shows all the clients that you have access to, with the status and the last accessed date.
- A “Locked” status means that another user has clicked the “DEACTIVATE” button on that client's Users list.
- A “Deleted” status means that you have clicked the “Leave” button, on this page.
Leaving a Client
Clicking “Leave” will display a confirmation dialogue box
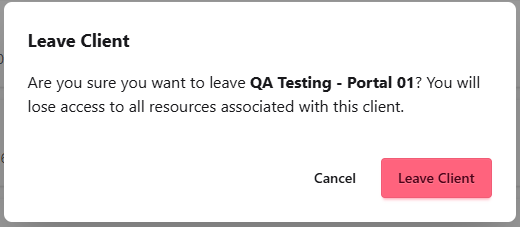
Click “Leave Client” to confirm that action, or “Cancel” the action.
Password
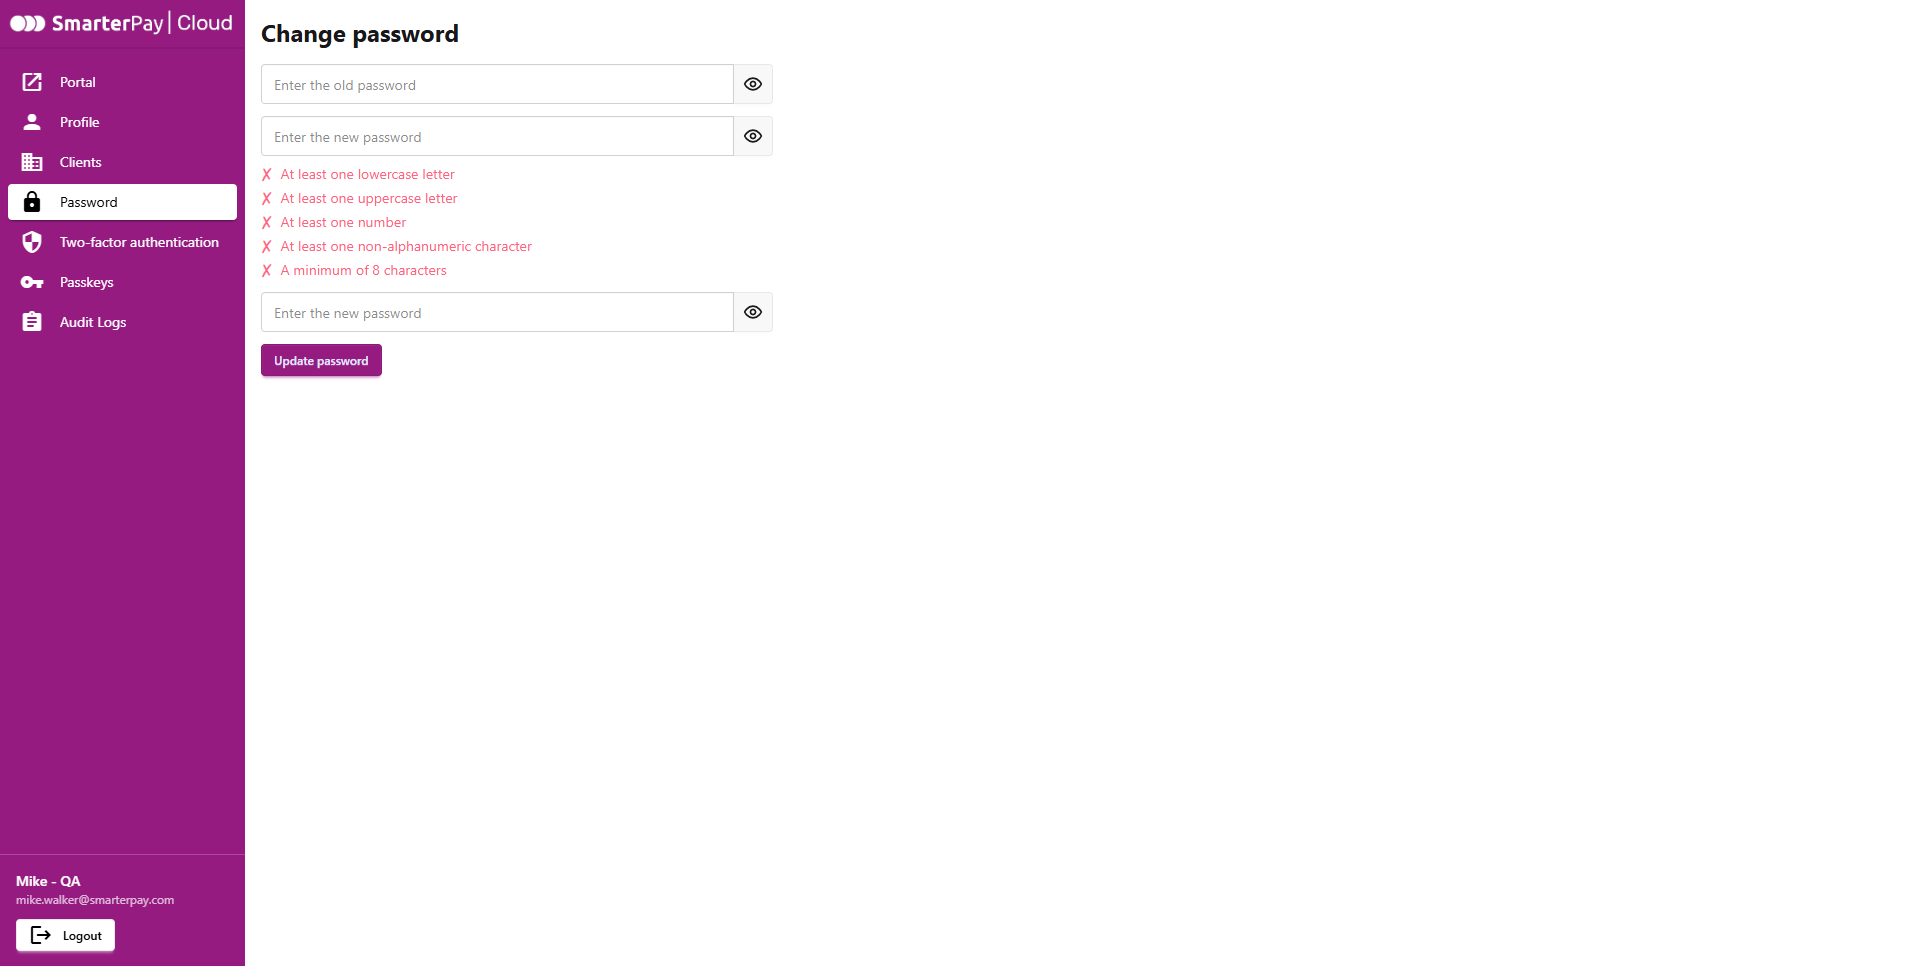
Changing you password
- Enter your old password.
- Enter your new password. (The New password must be at least 8 and at max 100 characters long.)
- Re-enter the new password.
- If the new password meets the password policy click “Update password”.
Two-factor authentication
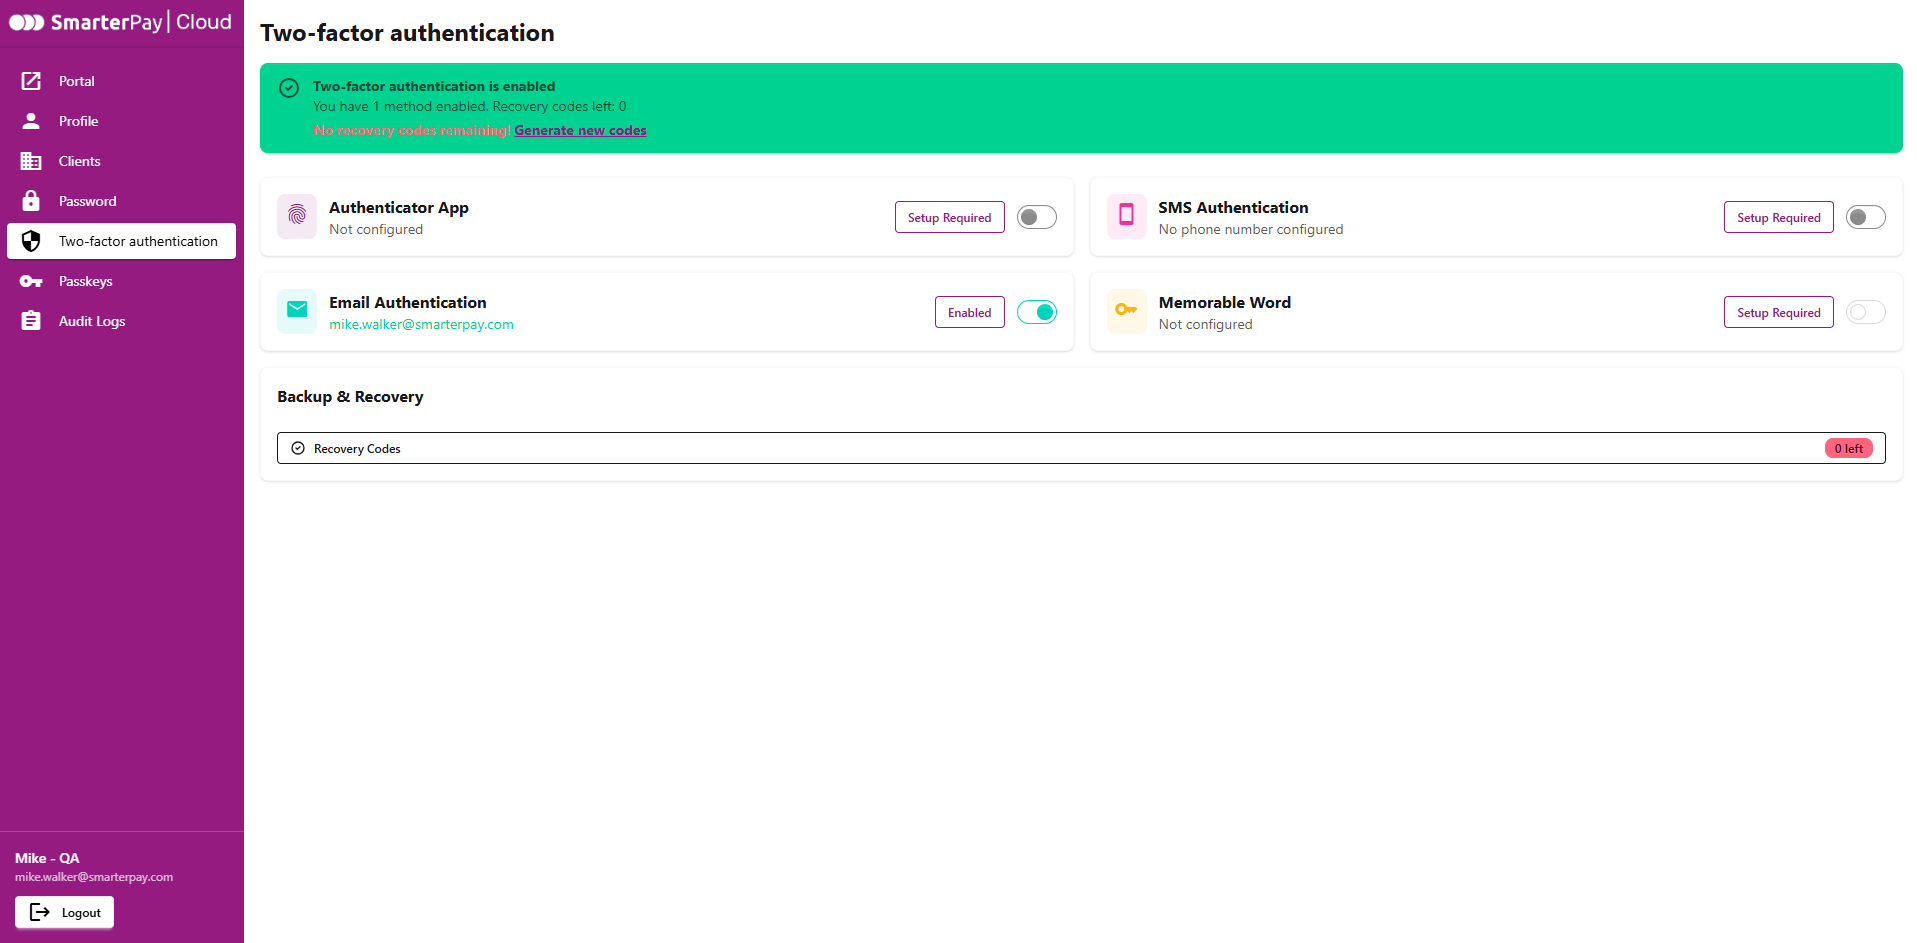
On this page you can setup, or change, the Two-factor authentication settings. At least one method has to be enabled, however, there can be more enabled (on login you can choose which method to use).
Authenticator App
To setup this method, first ensure that you have an authenticator app already installed, such as Google Authenticator or Microsoft Authenticator, and then click “Setup Required”.
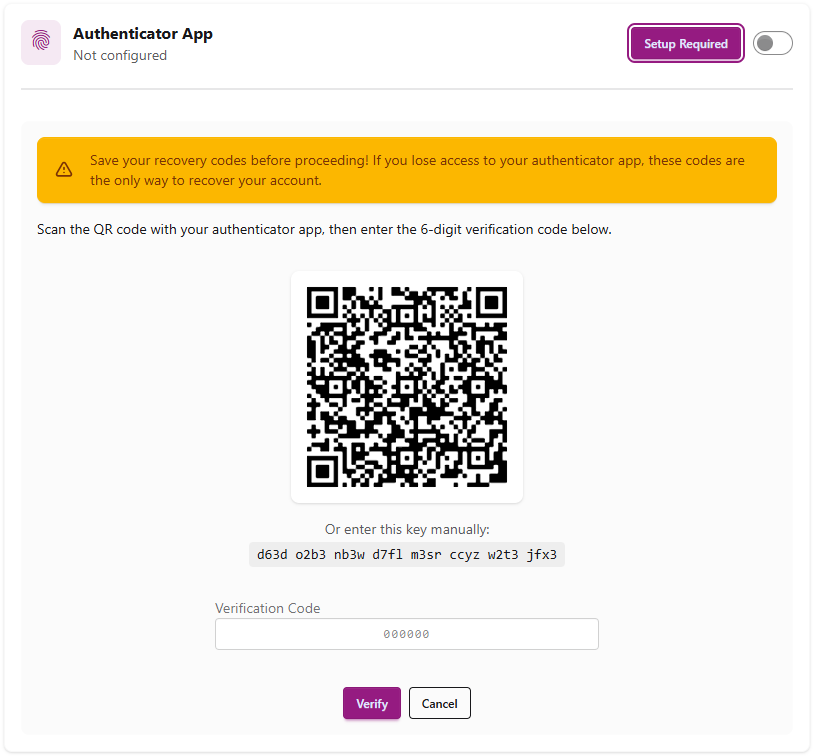
On the Authenticator app add an account and use the option to scan a QR code. Scan the QR code and then enter the 6 digit code into the text box and click “Verify”
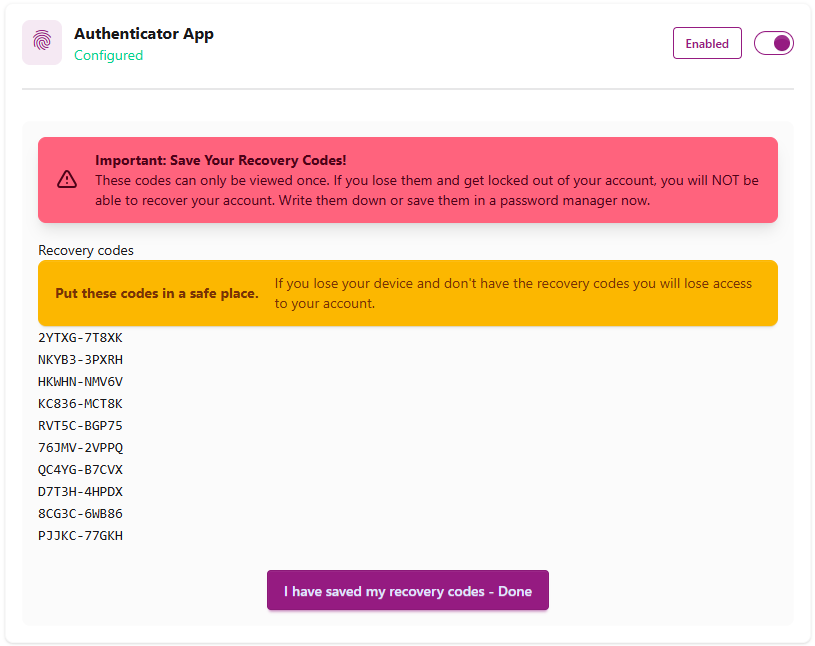
Make a note of the recovery codes and then click “I have saved my recovery codes - Done”

The method is now setup. It can be changed, enabled or disabled as required.
SMS Authentication
To setup this method click “Setup Required”.
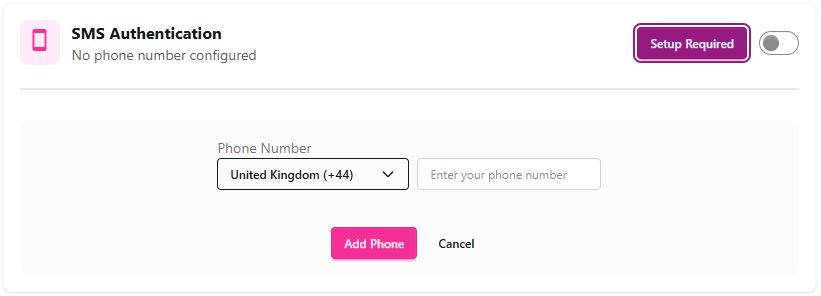
Change the region, if necessary, enter your phone number and click “Add Phone”
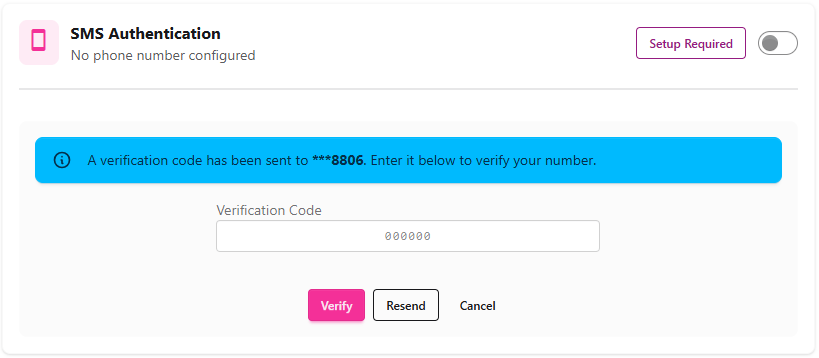
Enter the code that was sent to the phone and click “Verify”.

The method is now setup. It can be changed, enabled or disabled as required.
Email Authentication
For new user accounts, email authentication is the default method for Two-factor authentication.
The method is already setup. It can be enabled or disabled as required.
Memorable Word
To setup this method click “Setup Required”.
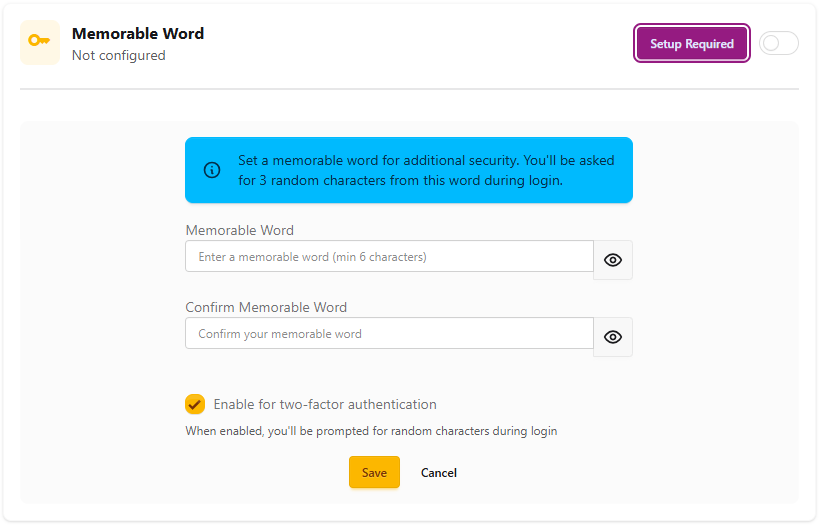
Enter, and then re-enter, your memorable word and click “Save”

The method is now setup. It can be changed, enabled or disabled as required.
Recovery Codes
To generate recovery codes click on the “Recovery Codes” bar.

Click “Generate Recovery Codes”
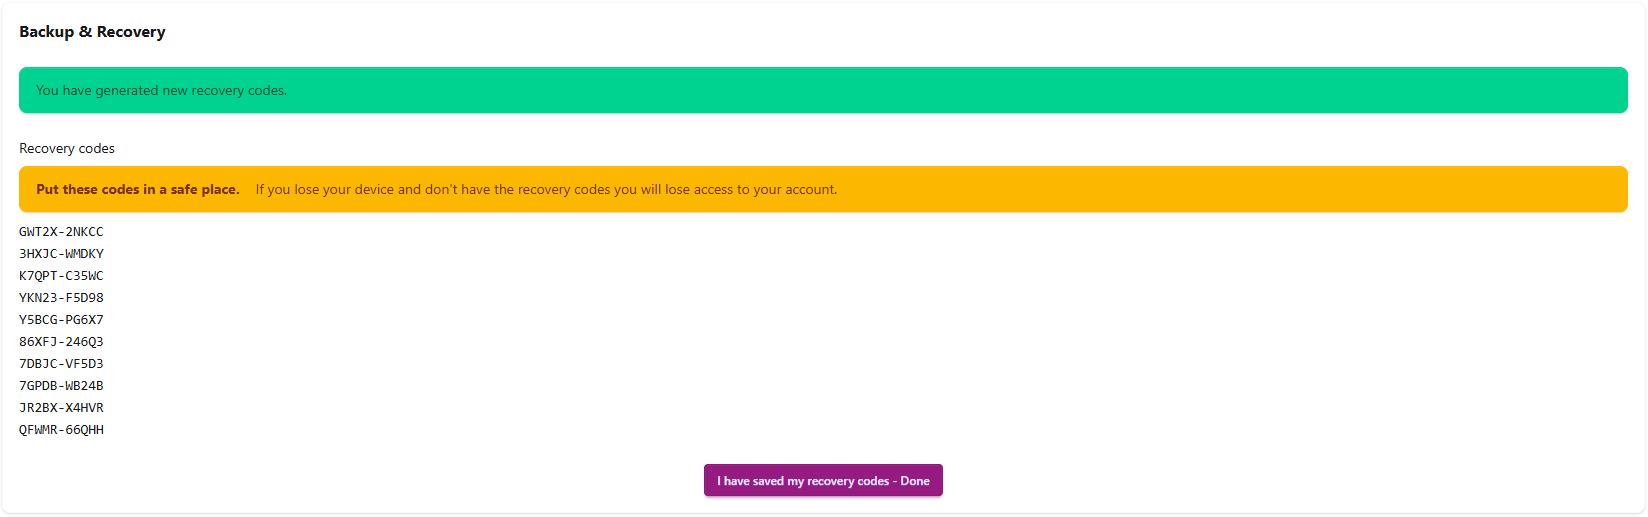
Make a note of the recovery codes and then click “I have saved my recovery codes - Done”

The “Recovery Codes” bar will display, along with the bar at the top of the screen, how many recover codes you have left.
Each recovery code can only be used once. After use it is discarded and the count is reduced.
Passkeys
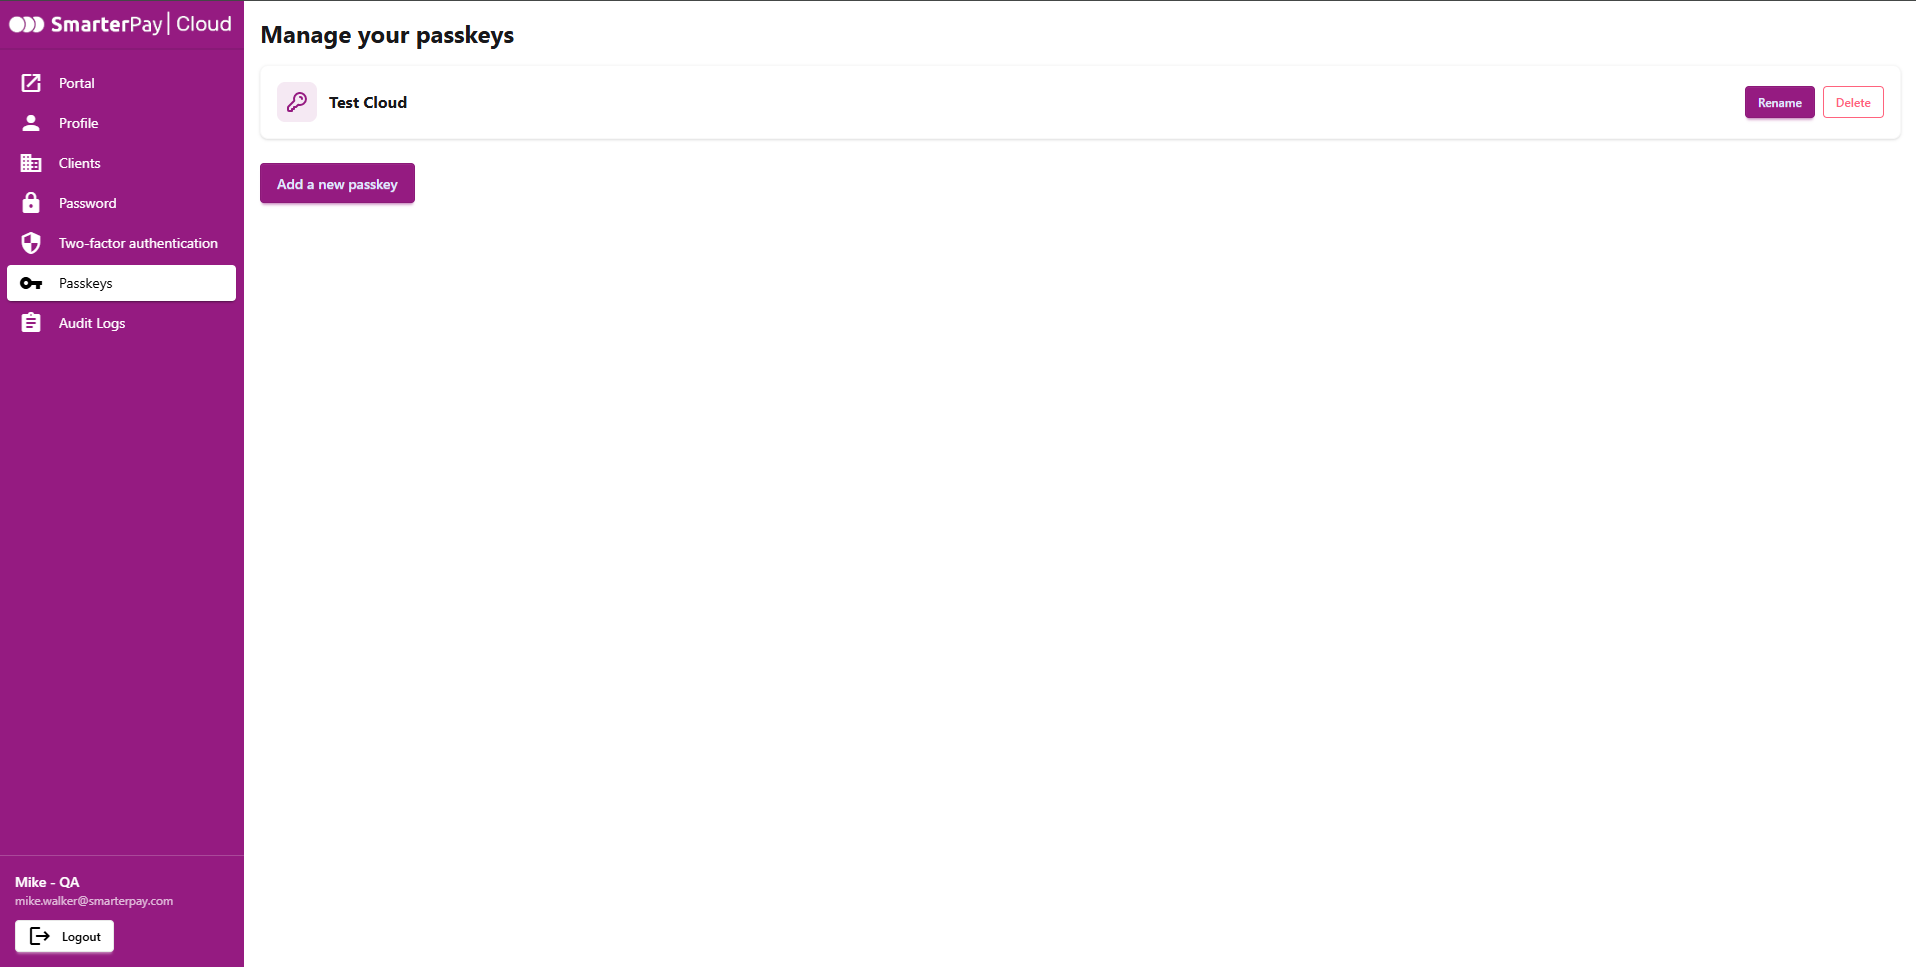
Passkeys are an authentication standard that replaces traditional passwords with cryptographic key pairs. Instead of typing a password, you log into apps and websites using the same biometric (Face ID, Touch ID) or PIN you use to unlock your device.
Setup
Click on “Add a new passkey”.
Follow your operating system prompts.
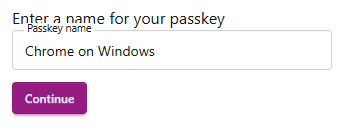
Give your passkey a name, or accept the default, and click “Continue”.
Audit Logs
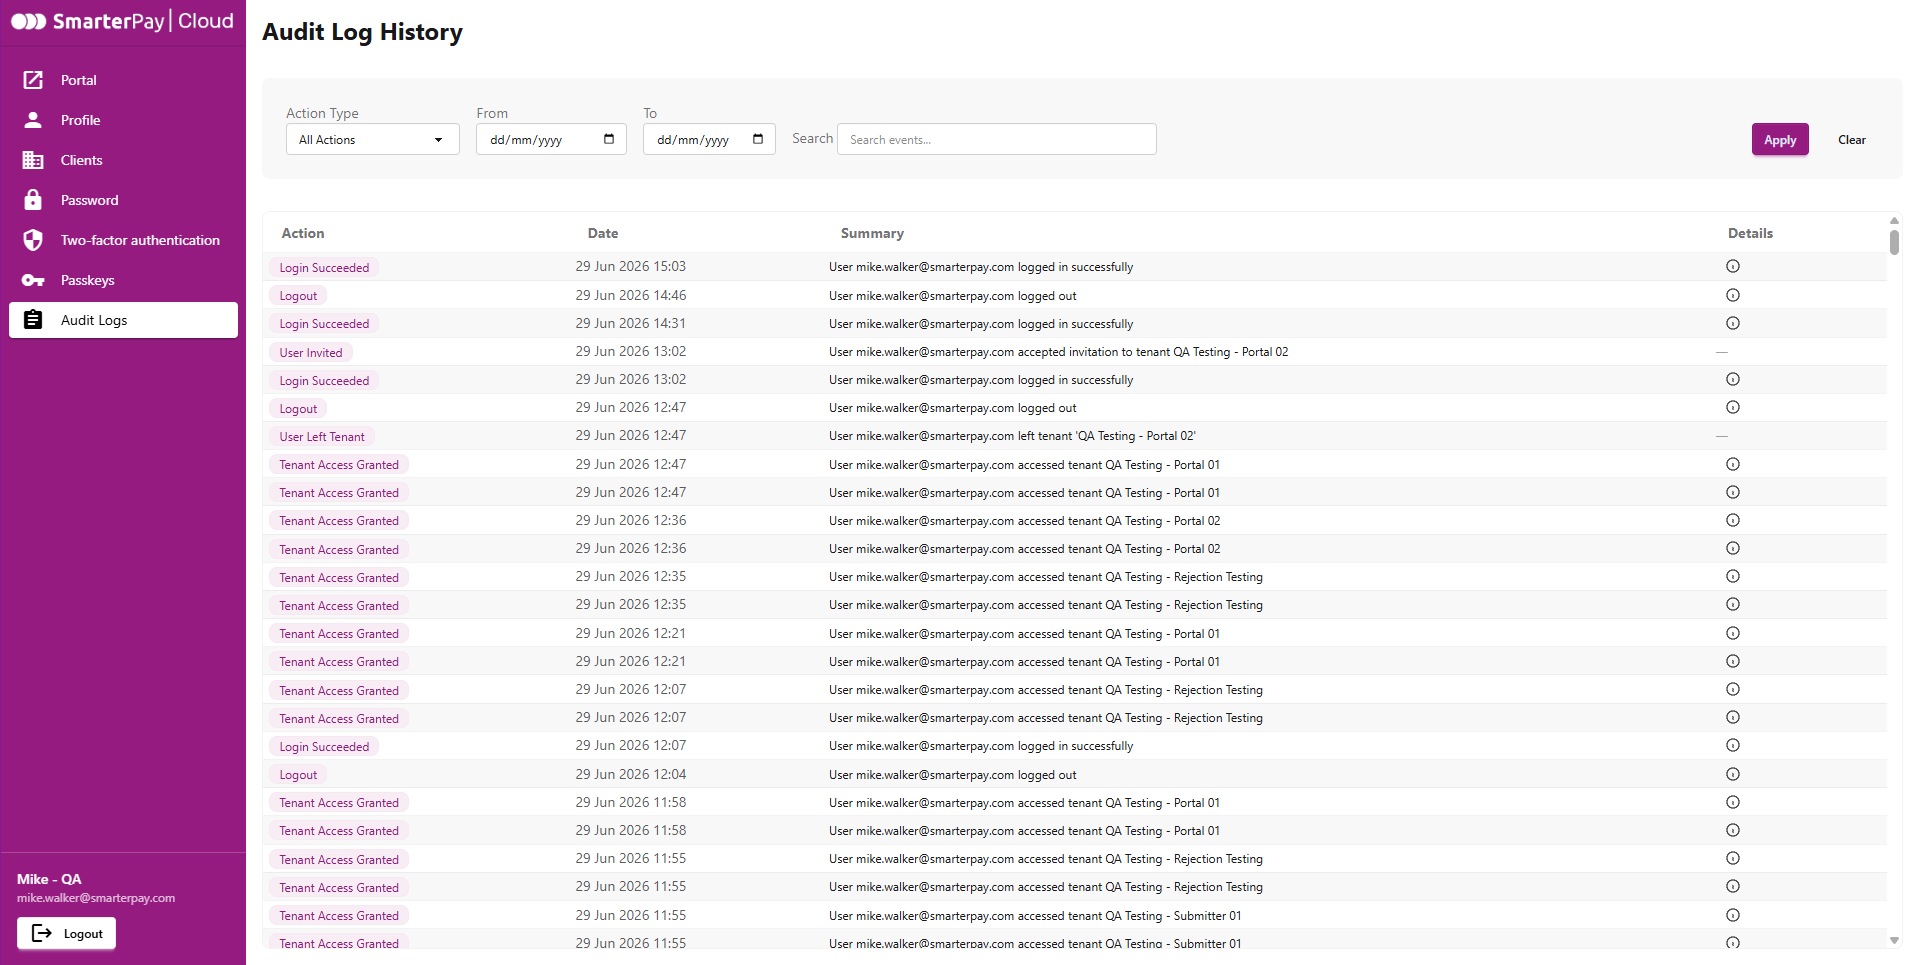
This section shows an activity log of your user account, latest first.
The list can be filtered by “Action Type”, “From”, “To”, a “Search” of the Summary, or a combination of the options.