Rejection Error Resolution
The status of the rejection line matching, and the type of rejection, will determine the layout of the screen and the options available.
NOTE:
All examples in this section of the WIKI refer to an “ARUDD 0” rejection and have the appropriate screenshots.
Other rejection types may show different record types that need to be matched, for example an “AWAC” would be matched to a Credit record, etc.
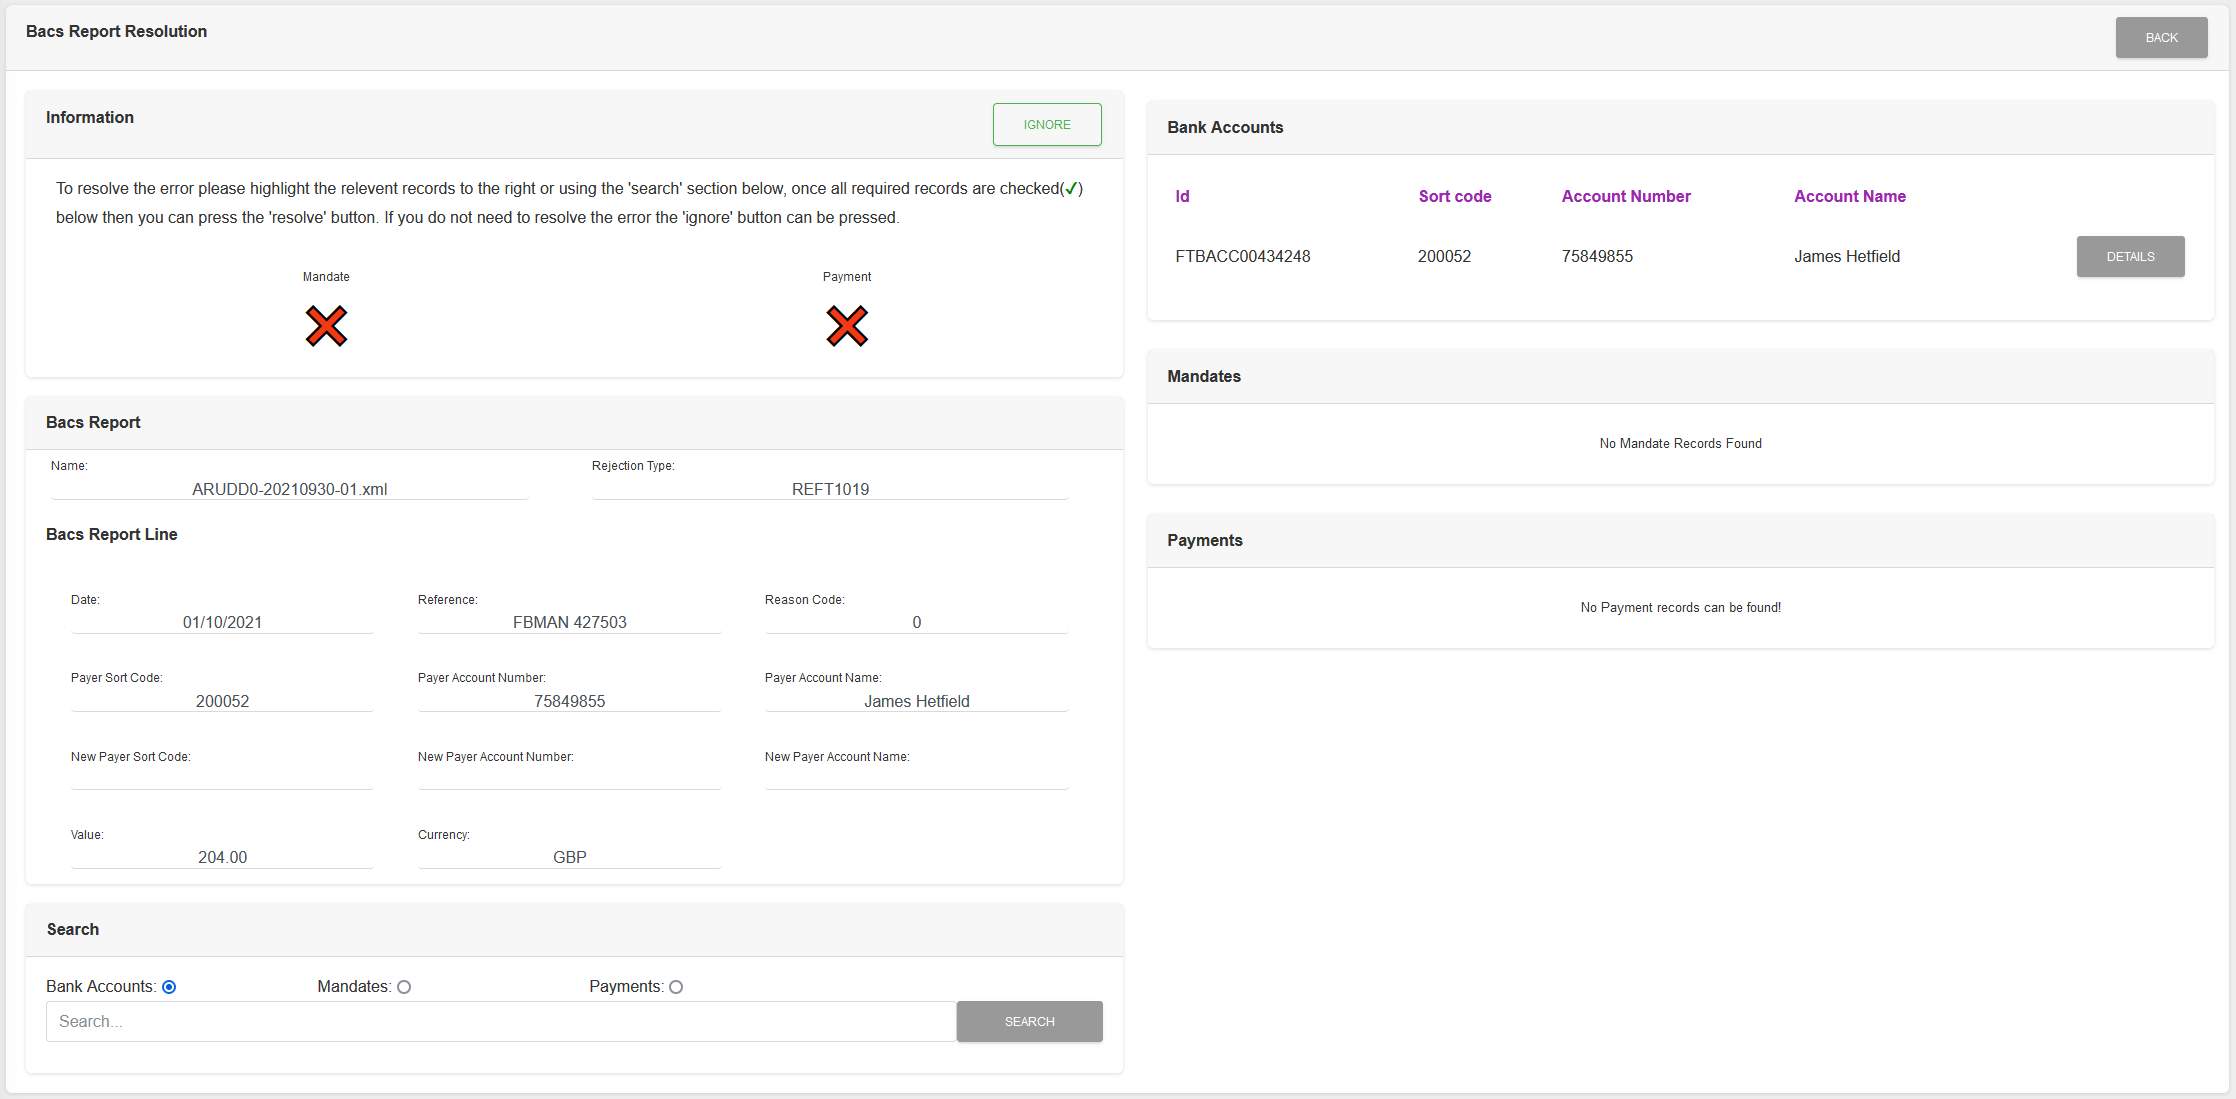
Option 1 - Manually Match The Records
Method 1 - Using System Suggested Records
If SmarterPay Cloud has found a Bank Account, or Bank Accounts, that match the details of the rejection line then they will be displayed.
If no Bank Account has been found then the Search Method can be used.
Step 1
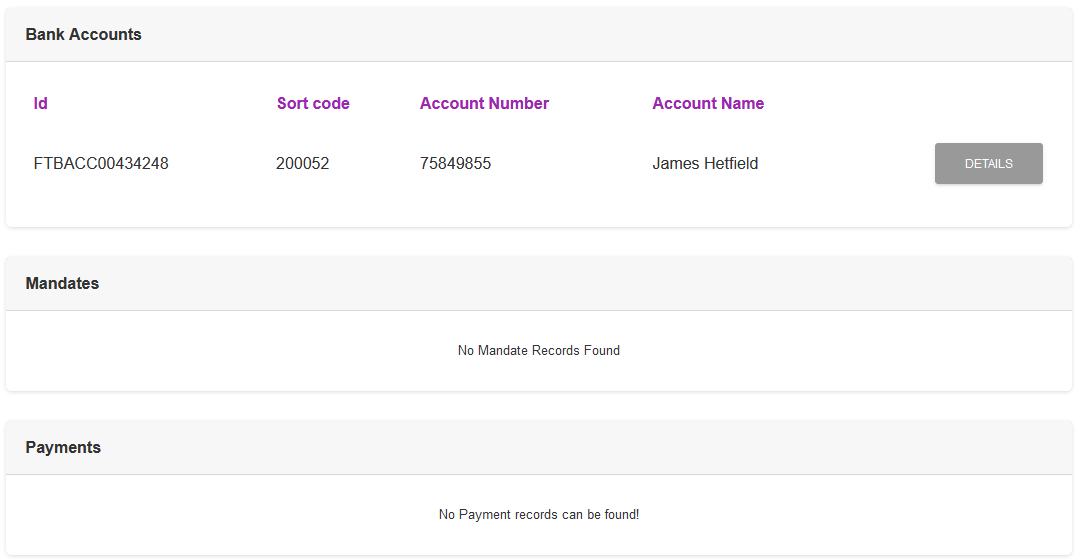
Identify the correct Bank Account and select it by clicking anywhere on the line, except the “DETAILS” button.
The record can be de-selected by clicking on it again.
Step 2
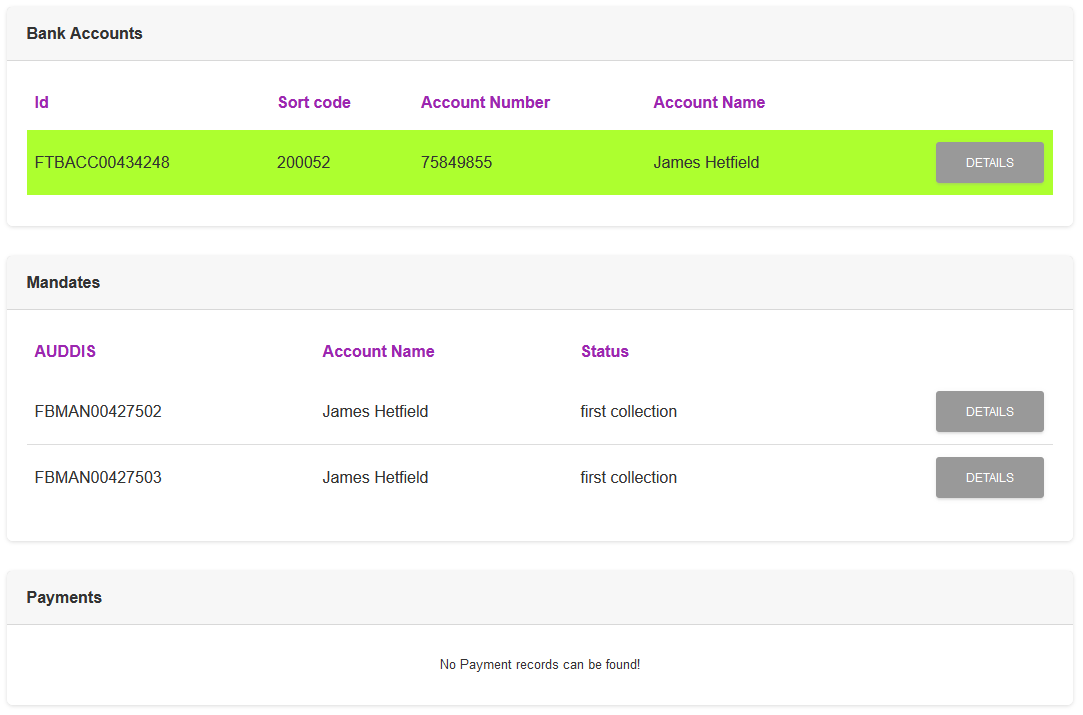
The Bank Account will be highlighted, and any Mandates attached to it will be displayed.
Identify the correct Mandate and select it by clicking anywhere on the line, except the “DETAILS” button.
The record can be de-selected by clicking on it again.
Step 3
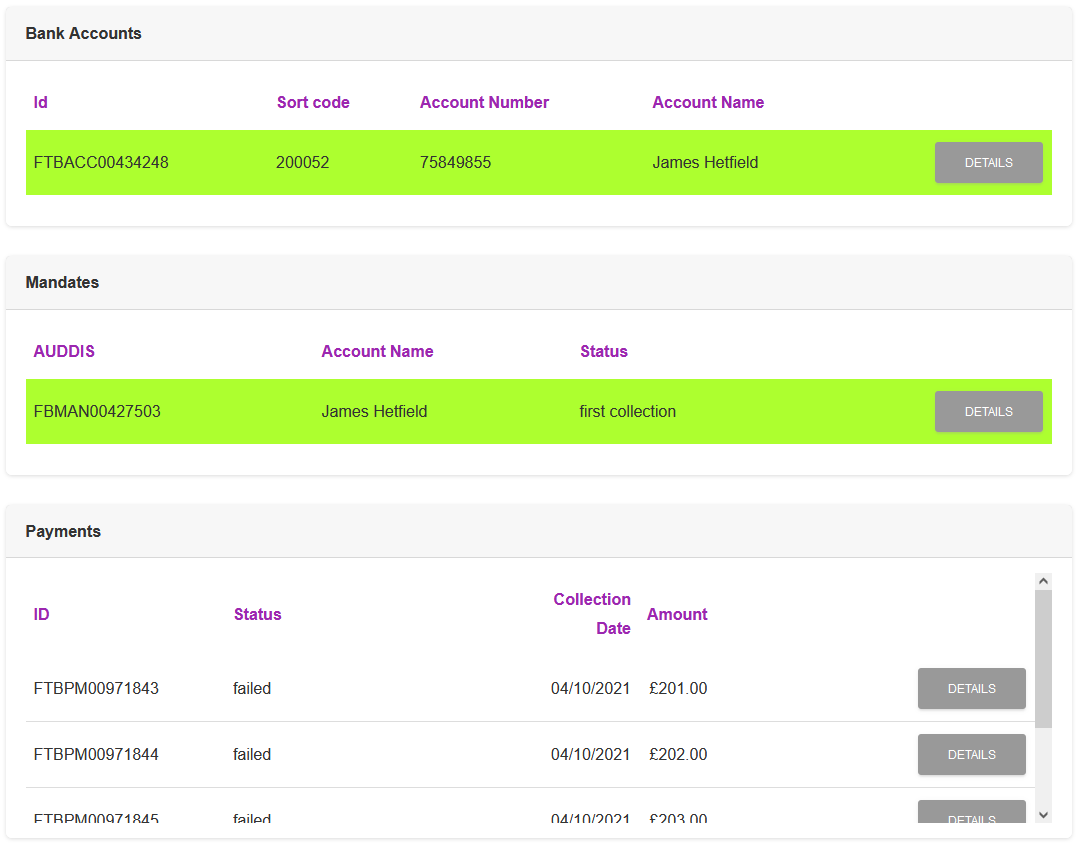
The Mandate will be highlighted, and any Payments attached to it will be displayed.
Identify the correct Payment and select it by clicking anywhere on the line, except the “DETAILS” button.
The record can be de-selected by clicking on it again.
Step 4
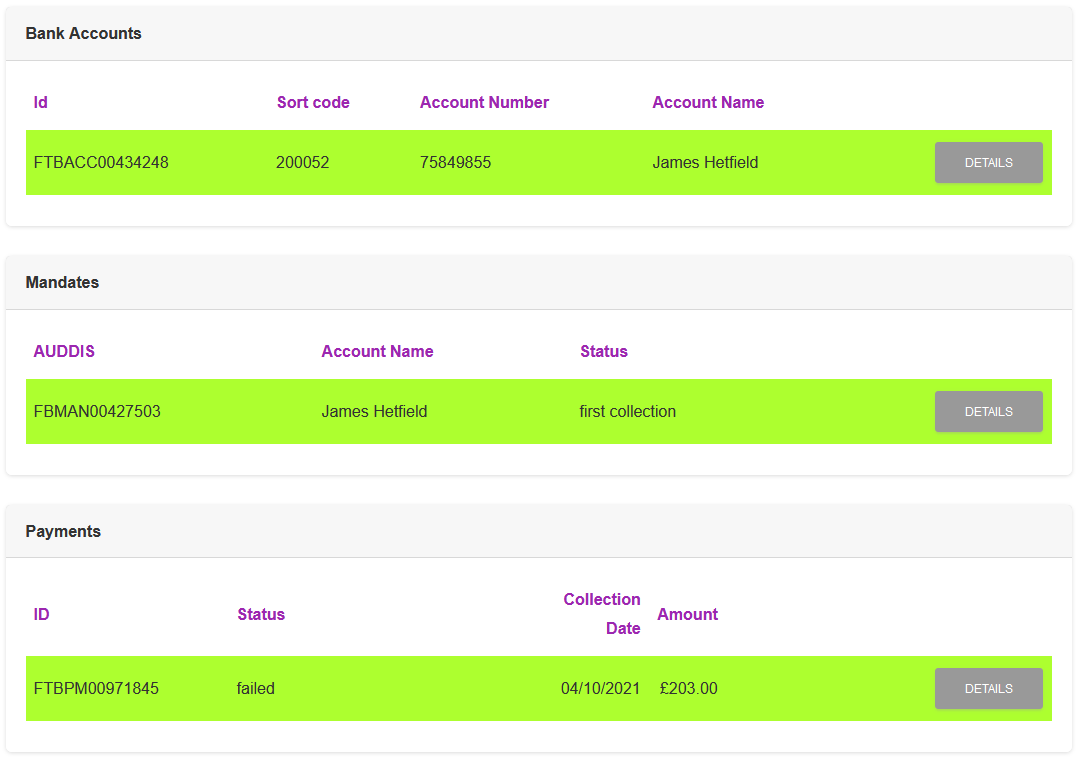
Once all of the required items have been selected you will see green ticks against the items in the information box, and the “RESOLVE” button will become available.
Click the “RESOLVE” button.
Step 5
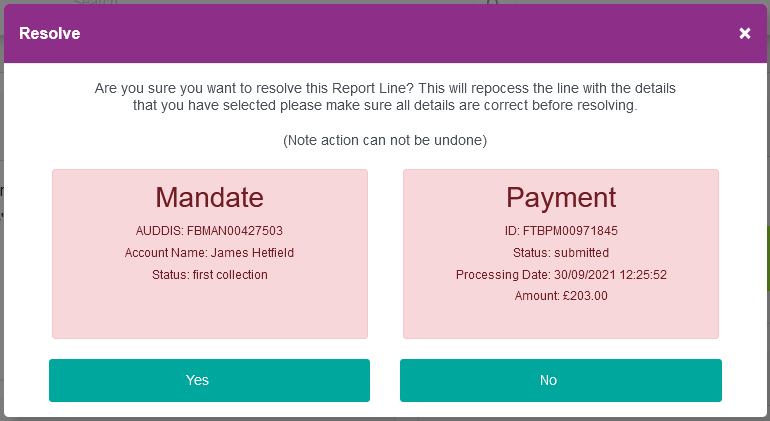
Double check the details of the resolution and click the “YES” button if happy. If not, click the “NO” button and make any necessary changes.
The Rejection will then be marked to reprocess.
Method 2 - Using Search
Step 1

Select the record type to search. Enter the search text, for example part of the Mandate reference, and click the “SEARCH” button.
Step 2
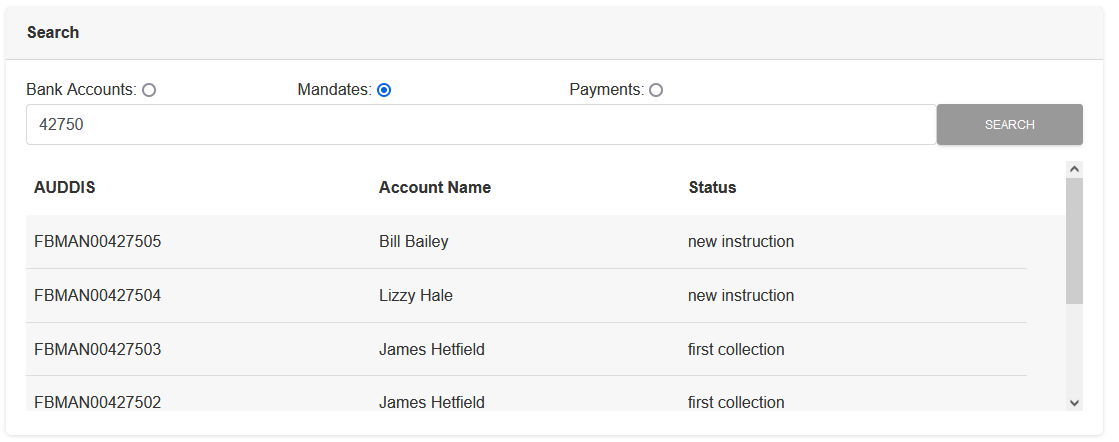
The records that match the search will be displayed.
Identify the correct record and select it by clicking anywhere on the line.
The selected record will be moved to the relevant section on the right of the screen.
Step 3
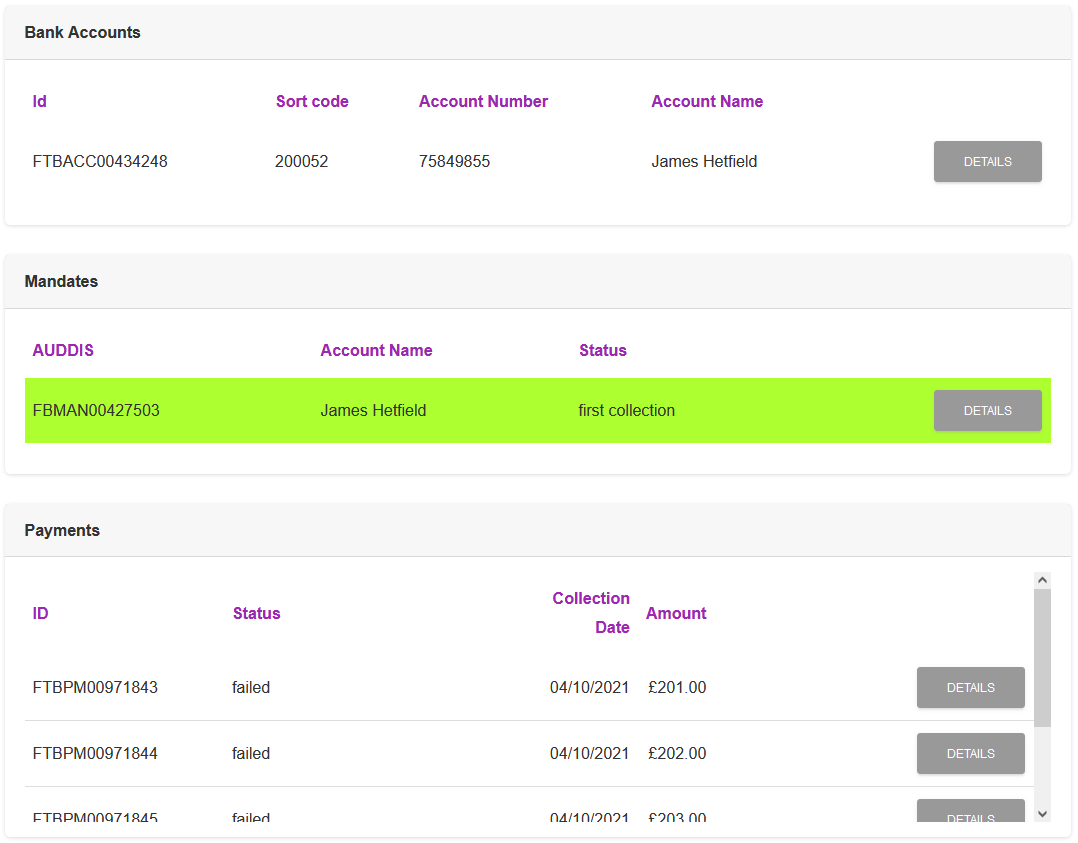
The Mandate will be highlighted, and any Payments attached to it will be displayed.
Identify the correct Payment and select it by clicking anywhere on the line, except the “DETAILS” button.
The record can be de-selected by clicking on it again.
Step 4
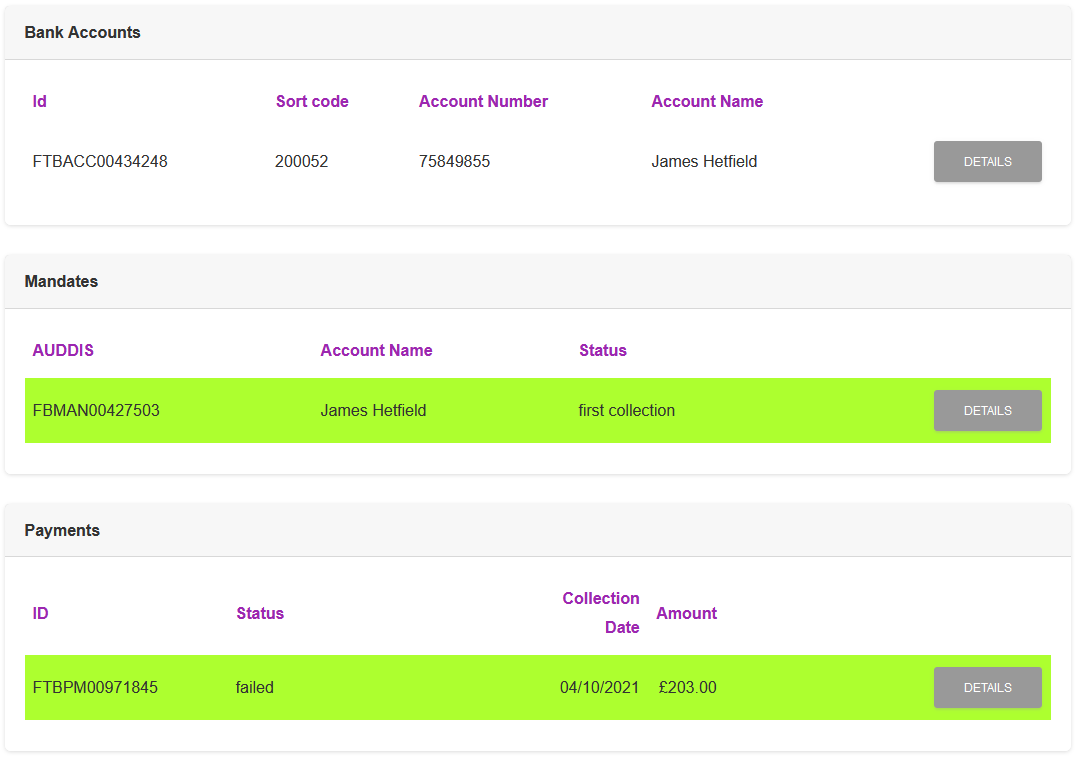
Once all of the required items have been selected you will see green ticks against the items in the information box, and the “RESOLVE” button will become available.
Click the “RESOLVE” button.
Step 5

Double check the details of the resolution and click the “YES” button if happy. If not, click the “NO” button and make any necessary changes.
The Rejection will then be marked to reprocess.
Option 2 - Ignore The Error
Step 1
Click on the “IGNORE” Button.
Step 2

If you are sure that you have the correct rejection line, and that you want to Ignore the error, go ahead and click the “Yes” button.
The “No” button will cancel the Ignore operation.
Step 3
The status of the rejection line matching, and the type of rejection, will determine the layout of the screen and the options available.
NOTE:
All examples in this section of the WIKI refer to an “ARUDD 0” rejection and have the appropriate screenshots.
Other rejection types may show different record types that need to be matched, for example an “AWAC” would be matched to a Credit record, etc.
Complete Report Line
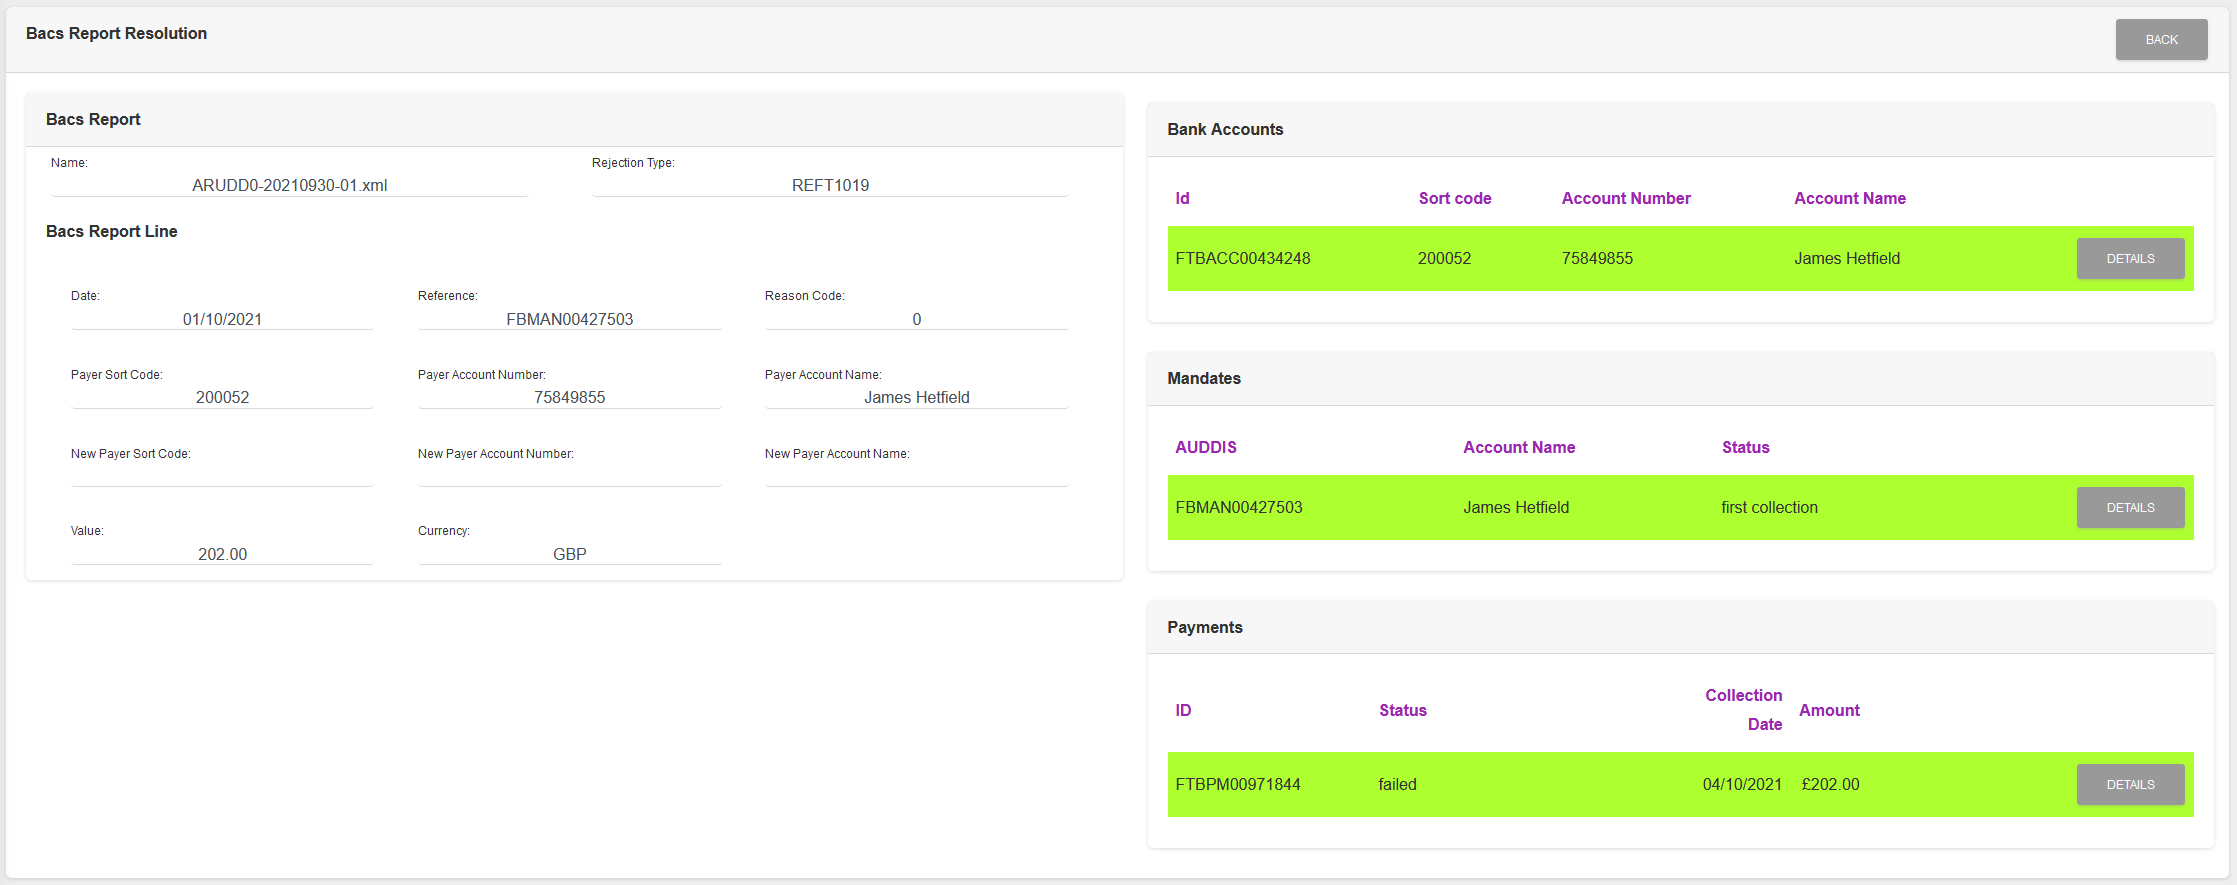
SmarterPay Cloud, or maual intervention, has successfully matched the rejection line with records in the system, as can be seen by the green highlight on the various record type sections (Bank Account, Mandate, Payment).
Actions
Available actions, subject to permissions, are:
| Action | Description |
|---|---|
| “BACK” Button | Returns to the Rejection File Lines list. |
| “DETAILS” Button | Opens the matched record details. |
Ignored Report Line

SmarterPay Cloud has been instructed to ignore the rejection line and therefore there are no matches shown.
Actions
Available actions, subject to permissions, are:
| Action | Description |
|---|---|
| “BACK” Button | Returns to the Rejection File Lines list. |
Errored Report Line

SmarterPay cloud has been unable to match the required records in the system, in this case Mandate and Payment, and so the status is an error.
In the example SmarterPay Cloud has found a Bank Account with matching details and so has displayed it as a starting point for manual matching.
Actions
Available actions, subject to permissions, are:
| Action | Description |
|---|---|
| “BACK” Button | Returns to the Report File Lines list. |
| “IGNORE” Button | Ignores the error. Please see the Rejection Error Resolution Page for more details. |
| “DETAILS” Button | Opens the record details. Can be used to identify the correct record to match the rejection line. Please see the Report Error Resolution Page for more details. |
| “SEARCH” Button | Searches the selected record type for the value entered. Please see the Report Error Resolution Page for more details. |