Submitting A File
User guide for submitting a file in SmarterPay Cloud.
| Contents |
|---|
| Tutorial |
| Step By Step Guide |
Tutorial
Step By Step Guide
1.
From the File Upload List View click on the “UPLOAD FILE” button.
2.
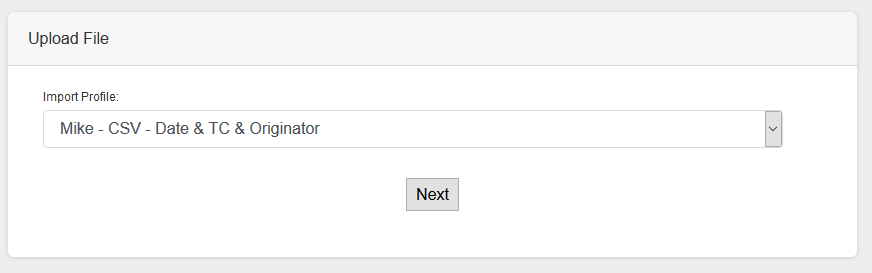
Select the Import Profile, and date (if not defined in the File Format configuration), from the dropdown list and click the “Next” button.
3.
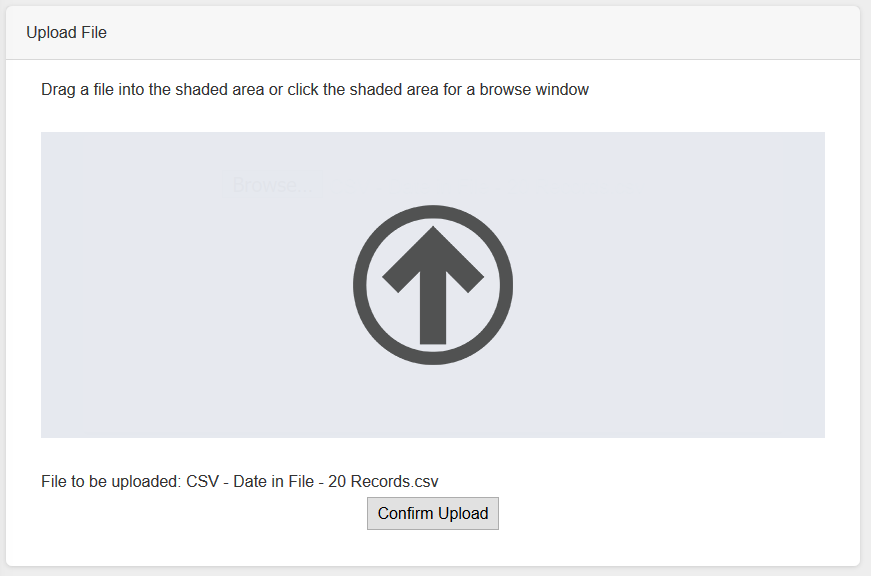
Click on the Shaded area and pick a file, or drag a file into the shaded area, to select it for upload. Verify that the filename is correct by the “File to be uploaded” text above the “Confirm Upload” button. Once happy click the “Confirm Upload” button.
4.
Your file is now being uploaded to SmarterPay Cloud. Once the file has been received the screen will change to show that your file is queued for processing.

Once a processing slot becomes available your file will be processed.
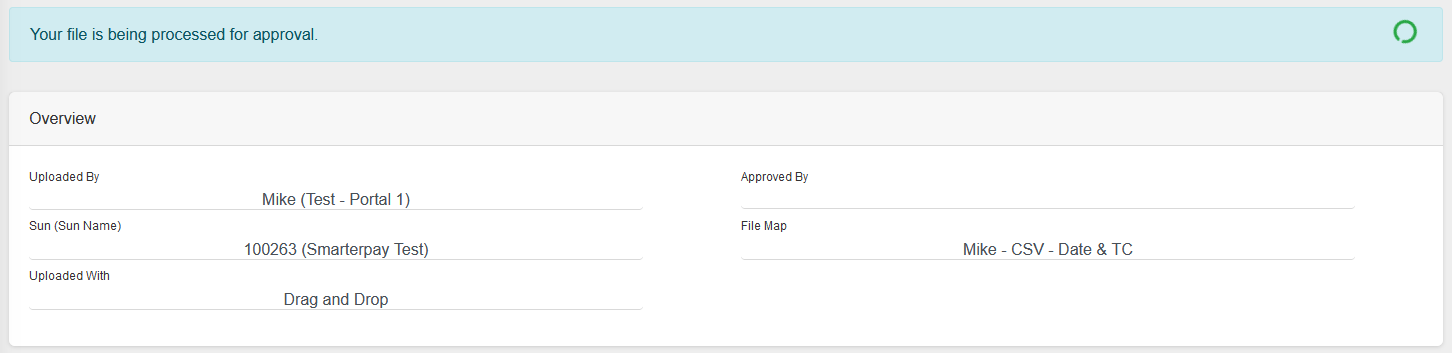
The system is now checking the file uploaded with the file map selected to see if there are any issues. Whilst this is happening the processing screen is displayed. Larger files may take a few minutes to process.
The upload process runs in the background and so you do not need to be on this screen and wait for it to complete. You can revisit this record at any time to see it's progress.
Once this upload is complete, a notification email will be sent to Approvers that:
- The file is uploaded and ready for Approval.
- The file has uploaded but contains errors that need attention.
5.
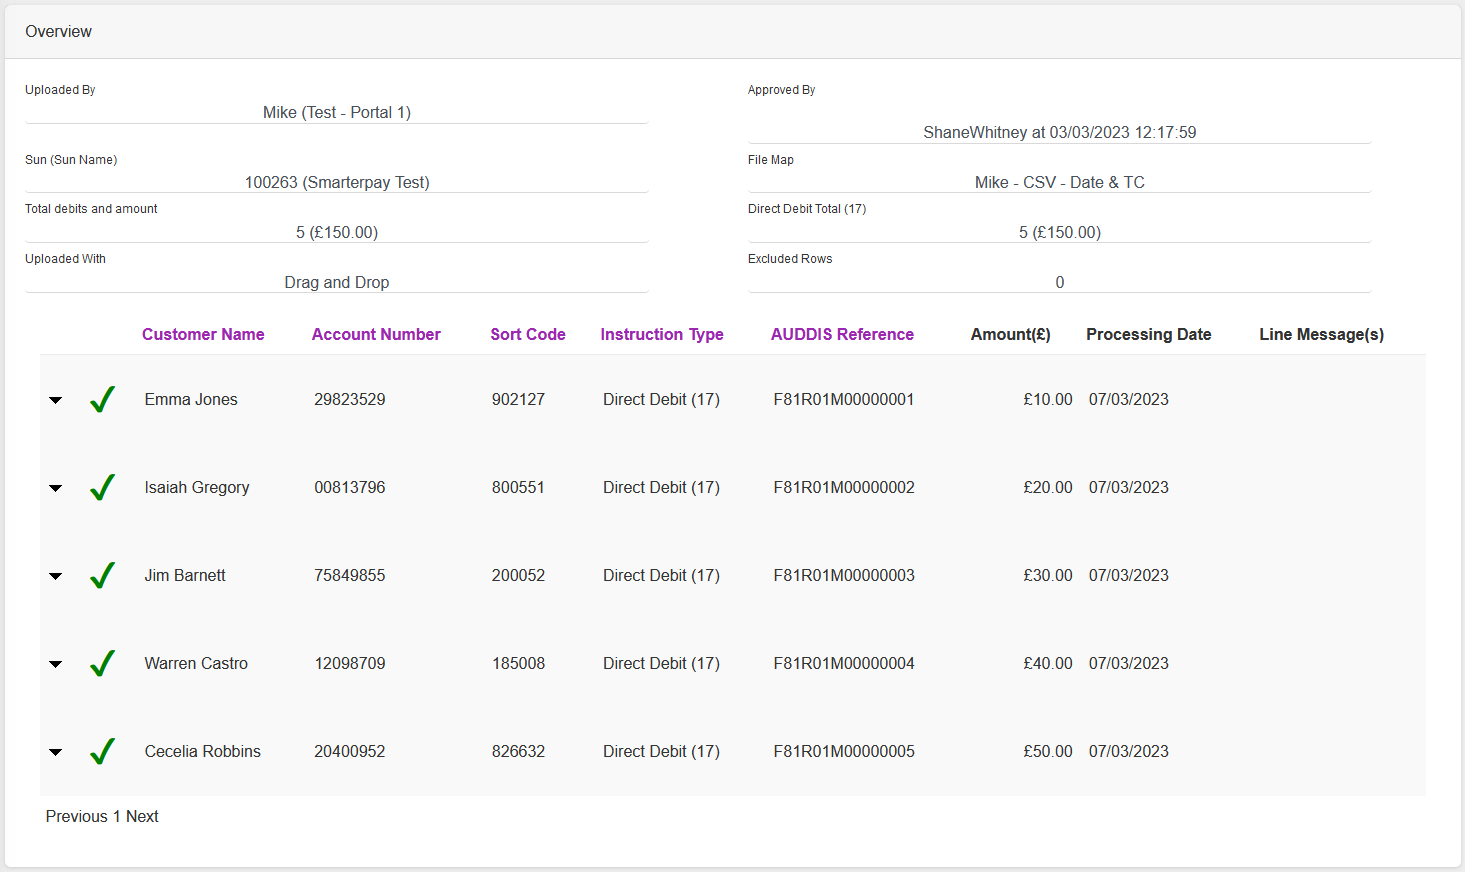
When the uploading processing has finished the screen will show the File Upload Detail View.
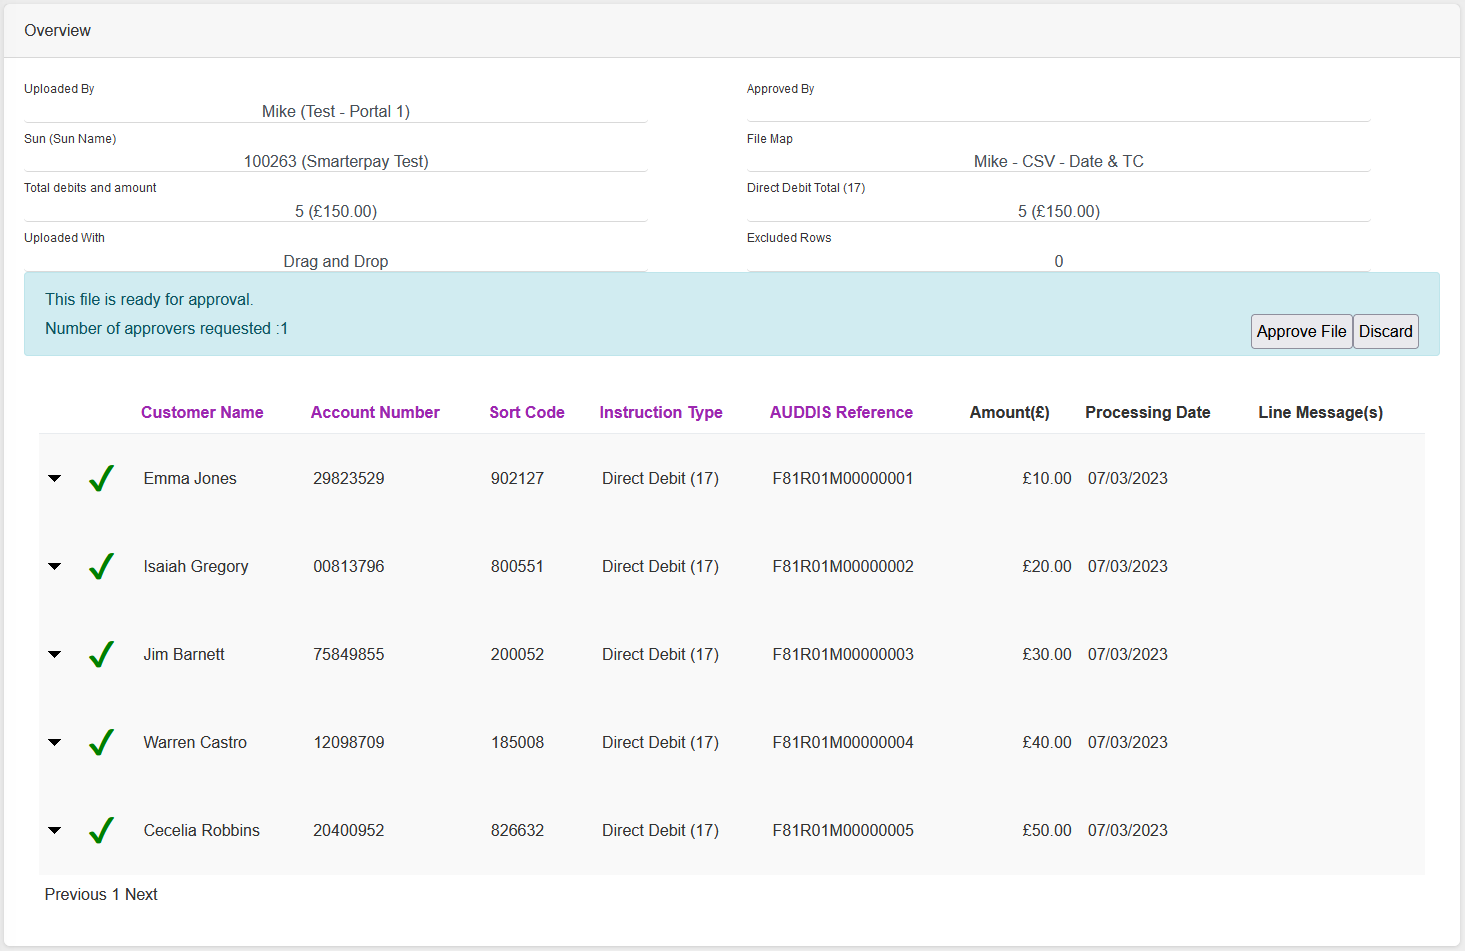
If the uploaded file doesn't contain Warnings or Errors then, once manually checked for correct values, it can be approved by clicking the “Approve File” button.
The “Excluded Rows” count shows the number of records ignored by SmarterPay Cloud due to Conditions set in the File Format.
The total number of users needed to approve the file, before it is processed, is shown next to “Number of approvers requested”. The users that have already approved the file is shown under “Approved By”. Once the required number of approvers is met the file is processed.
6.
Your file is now being marked for approval. Once your file has been marked for approval the screen will change to show that your file is queued for processing.
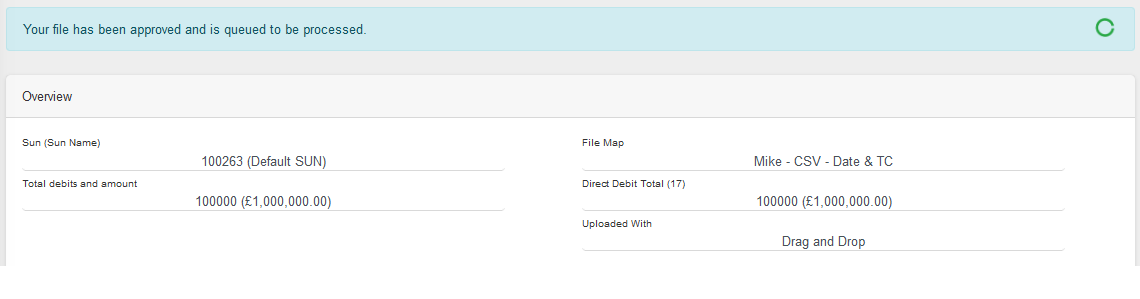
Once a processing slot becomes available your file will be processed.
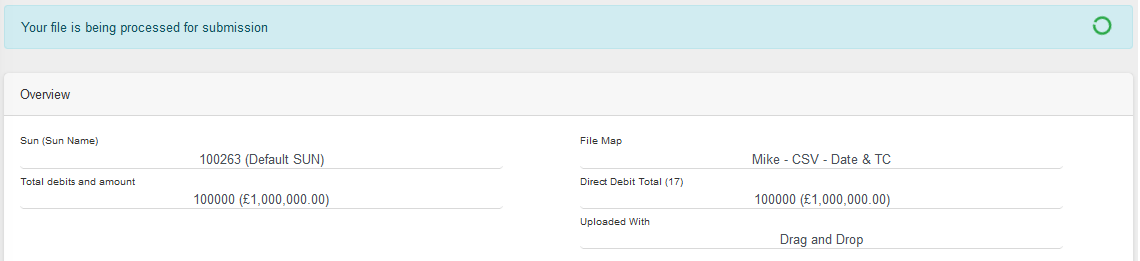
The system now processes the file to get it ready for submission. The approval process runs in the background and so you do not need to be on this screen and wait for it to complete. You can revisit this record at any time to see it's progress.
7.
When this Approval process has finished the screen will show the File Upload Detail View.