Select Certificate Dialog
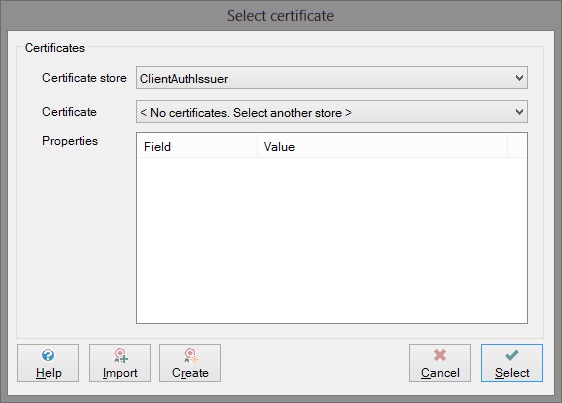
Certificate store
Use the dropdown arrow alongside this field to select the appropriate certificate store i.e. the store where the certificate you want to use is kept.
Certificate
If the certificate store you have selected contains no key certificates of the type you require (i.e. private or public, depending on the function for which you are selecting the certificate), the Certificate field will display a message to that effect, telling you to select another store.
Once you have selected a certificate store containing certificates of the type you require, use the dropdown arrow to select the certificate you want from that store. Any properties of that certificate will be displayed in the Properties section.
Properties include:
- Whether or not the certificate encapsulates a private key
- The signature algorithm
- Issuer details
- Validity dates
Import button
If the certificate you want is not held in any of the certificate stores in the dropdown list, you can import another certificate by clicking on the Import button. This will bring up the “Import certificate” dialog.
Create button
If you are unable to select or import a certificate, you can create your own certificate by clicking on the Create button. This will bring up the “Create certificate” dialog.
More:
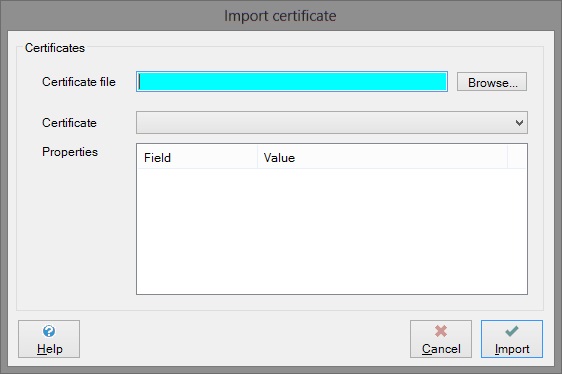
Import certificate
Certificate file
Find the certificate file you want by using the Browse button.
Certificate
Once you have selected a certificate file, the certificate dropdown list will be populated with a list of certificates that the file contains (in most cases a certificate file contains a single certificate, but sometimes it contains more). Use the dropdown arrow to select the certificate you want from that file. Any properties of that certificate will be displayed in the Properties section.
Click the Import button to complete the import process and return to the Select Certificate dialog.
Help
If you need more information about the fields on this page and how to fill them in, click on the Help button.
Cancel
If you want to discard all the changes you have made, click the Cancel button.
Import
To import the certificate you have selected, click the Import button.
Create certificate
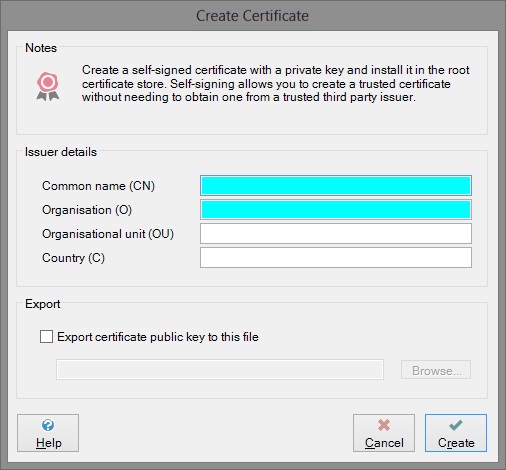
This dialog allows you to create a self-signed certificate with a private key and install it in the root certificate store. Self-signing allows you to create a trusted certificate without needing to obtain one from a third-party issuer.
Issuer details
The issuer details allow you to provide information that can be viewed in the Properties section when choosing a certificate.
Common name
Type in the common name that you wish to give to this certificate.
Organisation
Type in the name of the organisation with which this certificate is associated
Organisational unit
Type in the name of the organisational unit with which this certificate is associated
Country
Type in the name of the country in which this certificate was issued.
Export
If you wish to export the public key for this certificate to another file, select the tickbox and use the Browse button to choose the name and location of the file to which you want to export it.
Once you have provided the required details, click the Create button to create the certificate. You will be returned to the Select certificate dialog, where you will now see that your self-signed certificate has been added to the root certificate store and can be selected. The Issuer details you provided on the Create certificate dialog can be viewed in the Properties section against the ‘Issuer’ caption.


