Application features
More:
Change Password
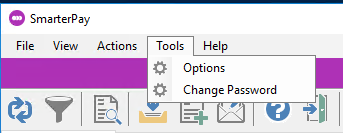
Users can change their own passwords, at anytime, by going to Tools → Change Password
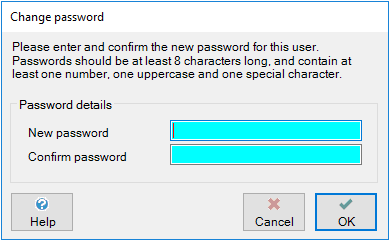
And entering, and confirming, the new password
Passwords must:
- Be a minimum of 8 characters and a maximum of 20 characters.
- Contain at least one number (0-9).
- Contain at least on Uppercase letter (A-Z).
- Contain at least one special character (!£$%^&*_+-={}[];'#:@~,./<>?).
Password History:
On password reset, either requested or through expiration, users cannot reuse the last 12 passwords.
Password Expiration:
Password Expiration is controlled under Server Settings.
Page tab banner
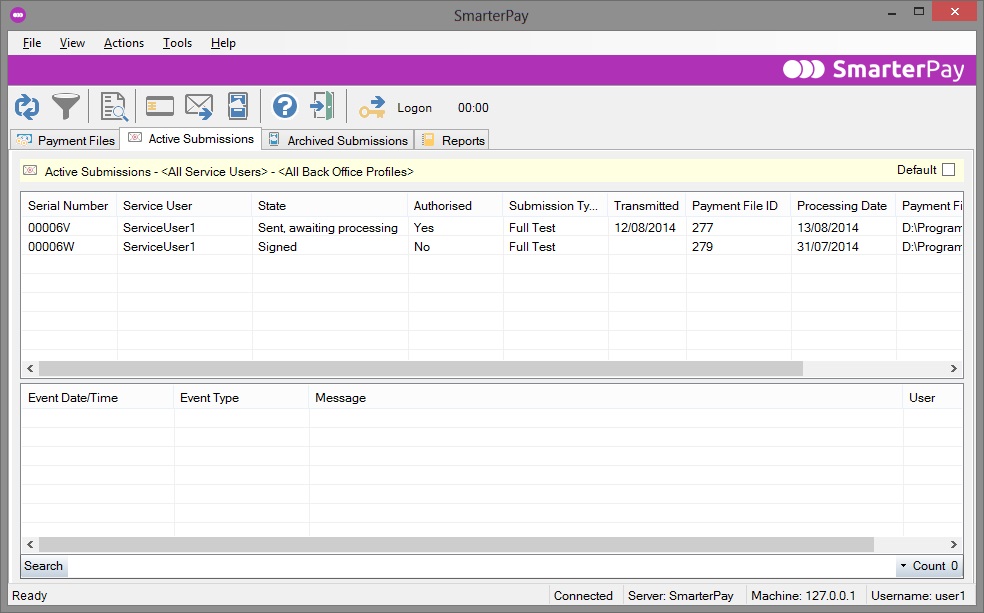
The page tab banner is the pale yellow banner you can see just below the level of the page tabs. It indicates which page you are currently looking at, and the filter settings for that page.
Default pages
The SmarterPay client consists of a number of pages. The pages you will be able to see, as an individual system user, will depend on the privileges you have been given by the administrator. For example, if you have been given permission to sign submissions and read reports received from Bacs, you will be able to see the Active Submissions page and the Reports page.
However many pages you have access to, you will see that at the right-hand side of the yellow page tab banner is a tickbox labelled “Default”. This allows you to choose which of the available pages you wish to be presented to you by default when you open the SmarterPay client.
Logon status bar
From every page of the SmarterPay client you will be able to see the current status of your connection to your network and your connection to Bacs, shown to the right of the toolbar. This can be seen in the dialog shown below:
The logon bar consists of a timer which states how long you have been logged on to the Bacs service, and a state indicator.
Status Indicator
The Status indicator tells you what is happening during your connection to Bacs. It will initially be blank when you first start up the SmarterPay client but will be populated once you have logged on to the Bacs service. When you begin to send submissions to Bacs or download reports, the status will change to tell you exactly what is happening e.g. Downloading Input report.
Logon button
The Logon button toggles between Logon and Logoff. If you are currently logged onto Bacs it will read “Logoff”. If you are currently logged off, it will read “Logon”. You may use the Logon button to logon to Bacs but this is not necessary, as any action you perform from the menu or toolbar which requires a connection to Bacs will automatically attempt to log you on. For details of the Logon to Bacs dialog, please refer to the section entitled Logon to Bacs.
Logon to Bacs
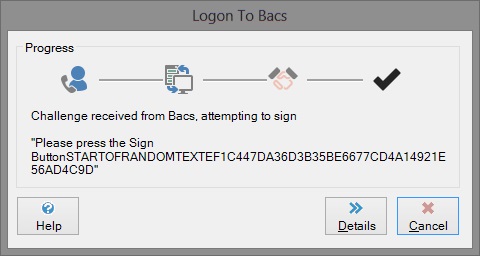
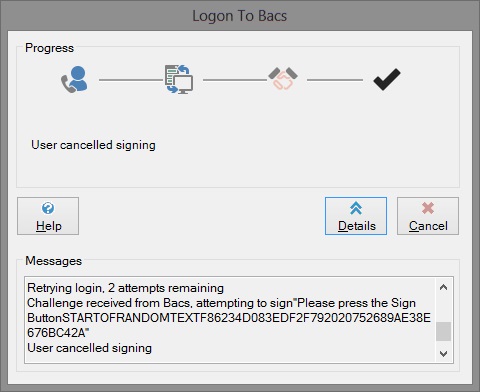
The Logon to Bacs dialog is shown below. It displays the current status of your attempt to logon to Bacs.
Full details of the logon process can be seen by clicking the Details button, as shown below.
Press the Details button again to hide the Messages section.
Unable to sign challenge from Bacs
When you attempt to logon to Bacs, your smart card has to be in the card reader so that the challenge from Bacs can be signed. If the signing fails, it may be for one of the following reasons:
- The smart card reader is not correctly installed. Check the documentation of your bank's chosen signing solution to ensure it is properly installed.
- The smart card is not ready to be used for signing. Some cards are shipped with a “Transportation” or “Initialisation” PIN number. This PIN must be entered, and a user PIN number set up before the card can be used for any purpose.
- The smart card is not correctly inserted. Try removing the card and re-inserting it slowly.
Try and rectify the situation and then attempt the logon again.
Print Report
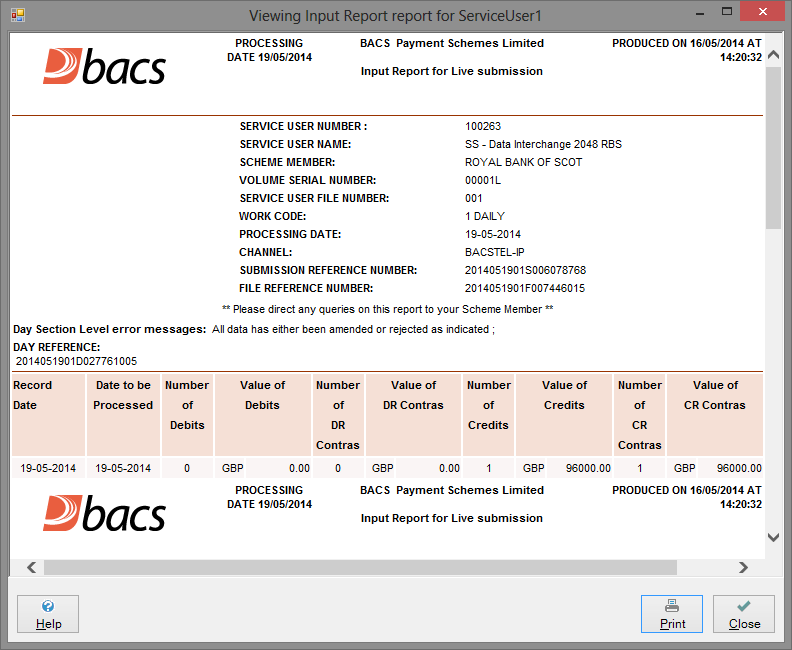
On each of the tabs in the client it is possible to select either a payment file, submission, Bacs report etc. and print a report that contains a summary of that item. This can be achieved by selecting the “View” button ![]() on the respective tab followed by the Print button on the following dialog:
on the respective tab followed by the Print button on the following dialog:
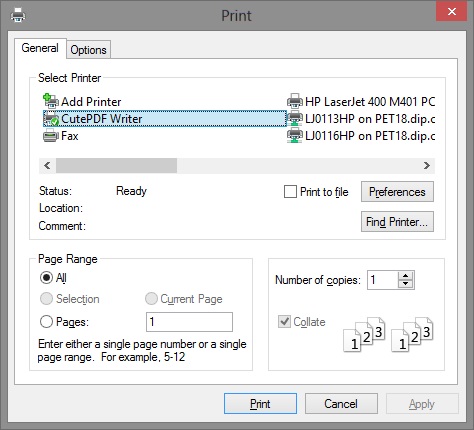
You may use the Print button to bring up the Windows Print dialog. This dialog enables you to change the settings of the default printer or to choose a different printer and configure its settings.
Click OK from this dialog to return to the Print/Preview report dialog.
Exit
Click the Exit button to close the Print/Preview report dialog.
Print
Click the Print button to print the report on the selected printer.
Preview
Click the Preview button to preview the report on the screen. You may then print it if you wish, either using the Print icon in the top left-hand corner of the Print Preview screen, or by closing the Print Preview screen and clicking the Print button on the Print/Preview report dialog.
Import File
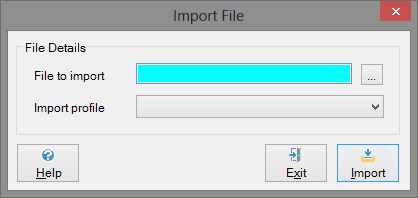
This option is available from the File options menu of every SmarterPay client view. It allows you to import payment files manually into SmarterPay. If you select this option, you will see the following dialog:
Files to import
Type in the full path and filename, or use the browse button, to select the location of the file to be imported.
Import profile
Use the dropdown arrow to select the appropriate import profile for the file to be imported. The list will display all the import profiles you have configured in the Back Office section of the Administrator.
Filters
Each page of the SmarterPay client has a filter option, available from the View menu option or by using the Filter icon in the tool bar. The filter allows you to select various criteria in order to determine which files or reports will be displayed to you on the current page.
Common to all the filters is the Date section, either Processing Date, Date Processed or Report Date. This area allows you to select a specific date or time period for which you want to view files or reports. By default, the All dates option is selected. If you want to change this setting, please read the following sections.
More:
Changing the time period
If you want to see something other than today's messages, you need to select a different radio button in the Processing Date section.
To do this using the mouse, simply point the cursor at the required radio button and click the left mouse button. The black spot will now appear in that radio button, to indicate your selection.
Alternatively, using the keyboard, use the Tab key to move the focus around the dialog until the focus is on one of the five radio buttons, then press the up, down, left and right arrows until the required button contains the black spot to indicate your selection.
Focus is the term we use to indicate the active field on the dialog. To recognise it, you will either see a dotted border around the relevant button name or a blue highlighted entry in a listbox. It is sometimes difficult to see when the focus is on a tickbox. In this case, you can only find it by a process of elimination (i.e. when the focus is not on any other button/listbox).
Warning – when the focus is on the From Date or To Date, using the up and down arrows will increase and decrease the date respectively. Use the tab key to move the focus off the From Date and To Date.
Your five choices are as follows:
- See all dates
- See only today's files
- See only tomorrow's files
- See only yesterday's files
- Select a time period for which you want to see messages, using the From and To fields (this is the Custom option)
Custom
If you select the Custom option, you will see that the From Date and To Date data boxes become available to you (i.e. they are no longer greyed out). To change the dates shown, you have two options:
Highlight the part of the date you want to change, either using your mouse or by using the left and right arrows on your keyboard. Then change that part of the date by using the up and down arrow keys on your keyboard.
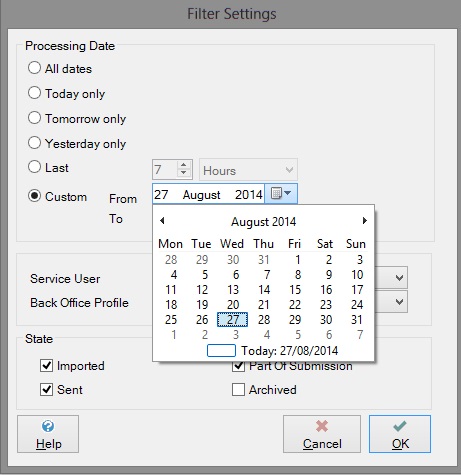
Alternatively, with the mouse use the dropdown arrow to the right of the date you want to change. This will bring up a calendar dialog like the one shown below:
The blue rectangle indicates today's date, and the blue mark indicates the date currently shown on the filter dialog. Use your mouse or your keyboard up and down arrows to select the date you want. The left and right arrows at the top of the calendar dialog enable you to change the month (left goes back in time, right goes forward in time).
Clicking a date with the left mouse button will return you to the filter dialog with the new date. If you are using the keyboard, press the Enter or Return button on your keyboard to return to the filter dialog with the new date.
Payment Files filter
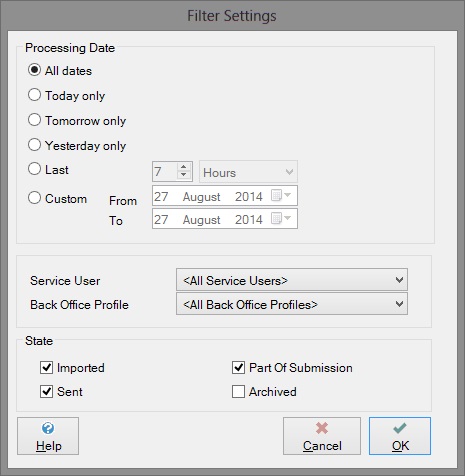
The Payment Files filter has three sections: Processing Date, Service User/Back Office Profile, and Status, as shown below:
To begin with, the filter is set to certain default settings which you will see when you open the filter. The default settings for the Payment Files filter are as follows:
- Show files for all dates
- Show files for all service users
- Show payment files with the status of Imported and Sent
You will see that the From and To date fields are “greyed out”. You will not be able to change the data in those fields unless you select the Custom option, which allows you to select a range of dates.
You can restrict the payment files that are shown in the SmarterPay client to a particular service user by selecting one from the drop down list. Selecting a particular back office profile will also limit what you see in the SmarterPay client. This is useful if you have multiple payment files imported from different back office profiles and only wish to view ones from a particular import type.
Payment Files Filter – Status
It is also possible to specify the status of the payment file. You can restrict the view to only show payment files that have been Imported, Sent, Archived or Part of a Submission by ticking the appropriate check box.
Active Submissions Filter
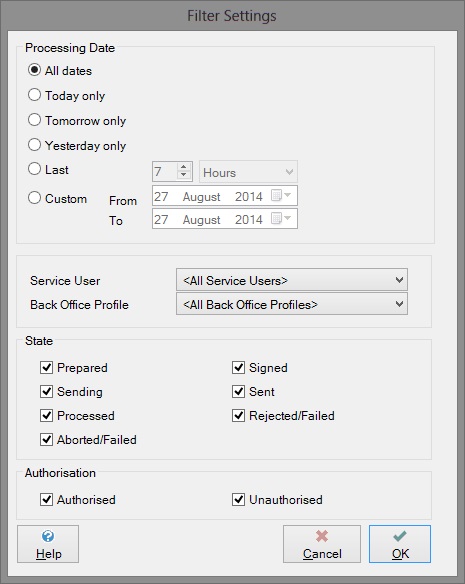
The Active Submissions filter has three sections: Processing Date, Service User/ Back Office Profile and Status, as shown below:
To begin with, the filter is set to certain default settings which you will see when you open the filter. The default settings for the Active Submissions filter are as follows:
- Show files for all dates
- Show files for all service users
- Show all file statuses
You will see that the From and To date fields are “greyed out”. You will not be able to change the data in those fields unless you select the Custom option, which allows you to select a range of dates.
You can restrict the active submissions that are shown in the SmarterPay client to a particular service user by selecting one from the drop down list. Selecting a particular back office profile will also limit what you see in the SmarterPay client. This is useful if you have multiple submissions imported from different back office profiles and only wish to view ones from a particular import type.
Active Submissions Filter – Status
It is also possible to specify the status of the submission. You can restrict the view to only show submissions that are Prepared, Signed, Sending, Sent, Processed, Rejected or Aborted by ticking the appropriate check box.
Archived Submissions filter
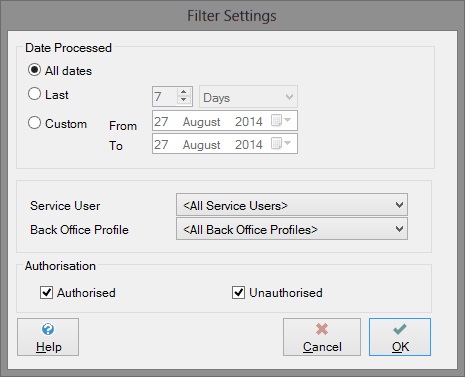
The Archived Submissions filter has two sections: Date Processed and Service User/Back Office Profile, as shown below:
To begin with, the filter is set to certain default settings which you will see when you open the filter. The default settings for the Archived Submissions filter are as follows:
- Show files for all dates
- Show files for all service users
You will see that the From and To date fields are “greyed out”. You will not be able to change the data in those fields unless you select the Custom option, which allows you to select a range of dates.
You can restrict the archived submissions that are shown in the SmarterPay client to a particular service user by selecting one from the drop down list. Selecting a particular back office profile will also limit what you see in the SmarterPay client. This is useful if you have multiple submissions imported from different back office profiles and only wish to view ones from a particular import type.
Reports filter
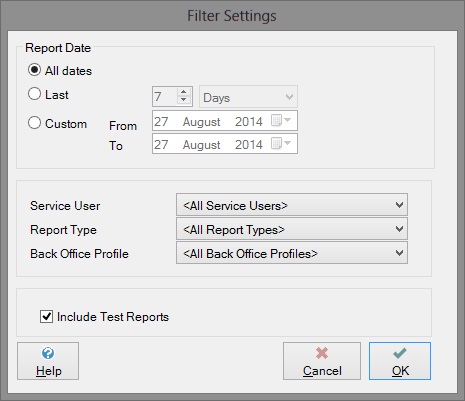
The Reports filter has three sections: Report Date, Service User/Report Type/ Back Office Profile and Include Test Reports, as shown below:
To begin with, the filter is set to certain default settings which you will see when you open the filter. The default settings for the Reports filter are as follows:
- Show files for the last 26 days
- Show all service users
- Show all report types
You will see that the From and To date fields are “greyed out”. You will not be able to change the data in those fields unless you select the Custom option, which allows you to select a range of dates.
You can restrict the reports that are shown in the SmarterPay client to a particular service user by selecting one from the drop down list. Selecting a specific report type will restrict the view to only show details for that type of report.
Selecting a particular back office profile will also limit what you see in the SmarterPay client. This is useful if you have submission results reports imported from different back office profiles and only wish to view ones from a particular import type.
The use of (T) following some reports in the Report Type list is an indication that these are test reports. If you want to include test reports in the list returned to you, please ensure that this checkbox is selected.
